>>
30-MINUTE MEALS! Get the email series now →

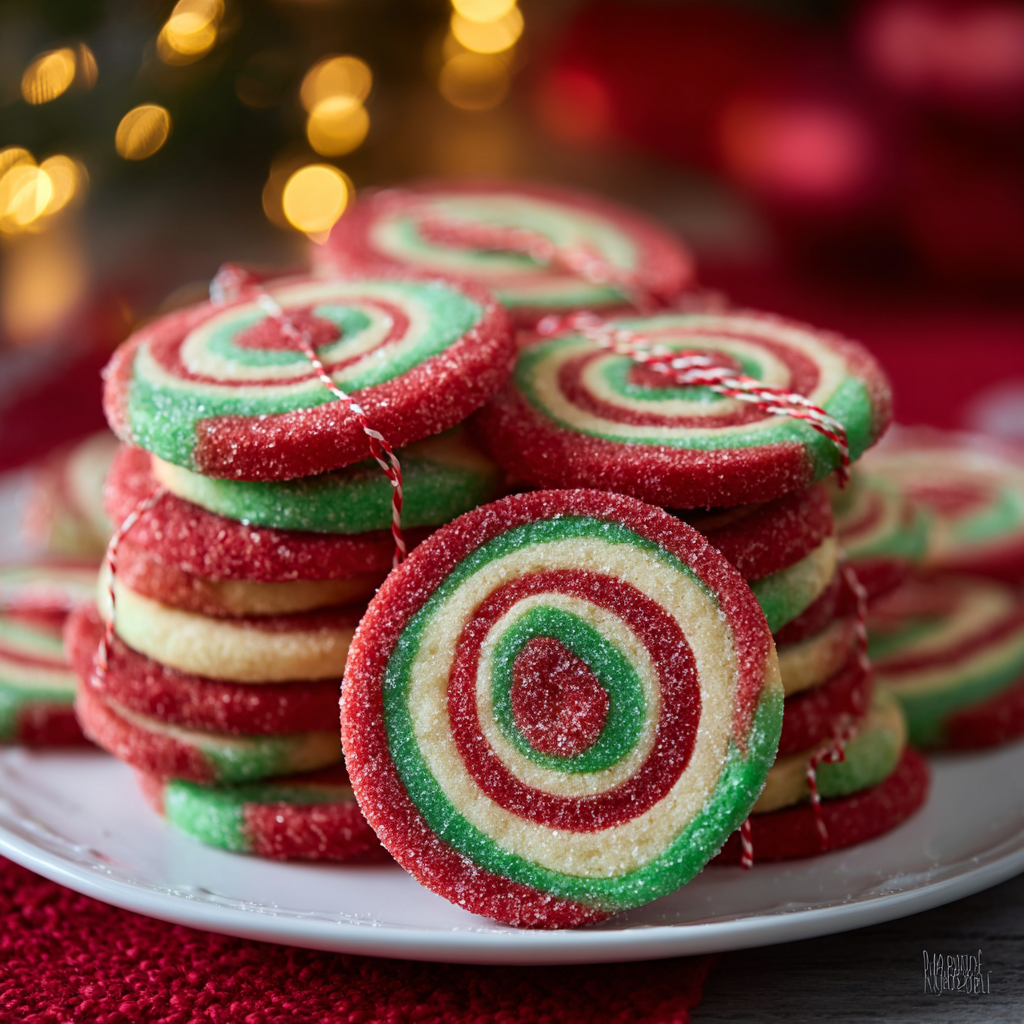
Festive red, green, and vanilla pinwheel cookies — crisp edges, tender centers, and perfect for holiday gatherings and cookie exchanges.

This recipe for Christmas pinwheel cookies has been a holiday tradition in my kitchen for nearly a decade. I first made these when I wanted something joyful and colorful to present at a neighborhood cookie swap; the spiral design and bright red-and-green stripes felt like holiday magic. The dough bakes up with slightly crisp edges and a tender, buttery center that melts on the tongue. Each cookie carries a subtle vanilla warmth balanced by the clean sweetness of sanding sugar on the outer edge.
I discovered the technique during an afternoon of cookie testing: I wanted a cookie that looked elaborate but relied on pantry staples and simple techniques. After a few trials — adjusting chilling times and the amount of coloring — this version emerged as the most reliable for shape, flavor, and texture. Picky kids loved the colors, my in-laws called them “impossibly festive,” and they became a standard at every holiday party since. These are a wonderful project to make with older kids or as a calm, creative baking afternoon for yourself.
Personally, I love how the dough forgivingly holds its spiral after rolling — the one-hour freeze is the key trick I learned after a few messy early attempts. Family members always comment that the cookies look like they came from a bakery, which makes these a happy and proud addition to holiday trays.
My favorite aspect is how these cookies bring people together. One year I packaged them in small cello bags and handed them out at a caroling event; neighbors’ faces lit up. The simple technique of stacking and rolling creates an eye-catching result that never fails to start conversations at gatherings.
Store completely cooled cookies in an airtight container layered with parchment to prevent sticking. At room temperature they’ll keep for up to 5 days; for longer storage, freeze in a single layer on a tray until firm, then transfer to a freezer bag or container for up to 3 months. To refresh slightly softened cookies, warm them in a 300°F oven for 3–4 minutes on a wire rack — this helps recrisp the edges without drying the center. Label packages with the date so you use older cookies first during the holidays.
If you need dairy-free options, swap the butter for 2/3 cup plant-based stick margarine with a high-fat content to mimic butter behavior; results will be slightly different in flavor but similar in texture. For gluten-free, replace all-purpose flour with a 1:1 gluten-free baking blend that contains xanthan gum; chill times may increase slightly. If you prefer a different color theme, use purple and white or blue and silver sanding sugar to match other celebrations. Avoid replacing gel colors with liquid—they will soften the dough.
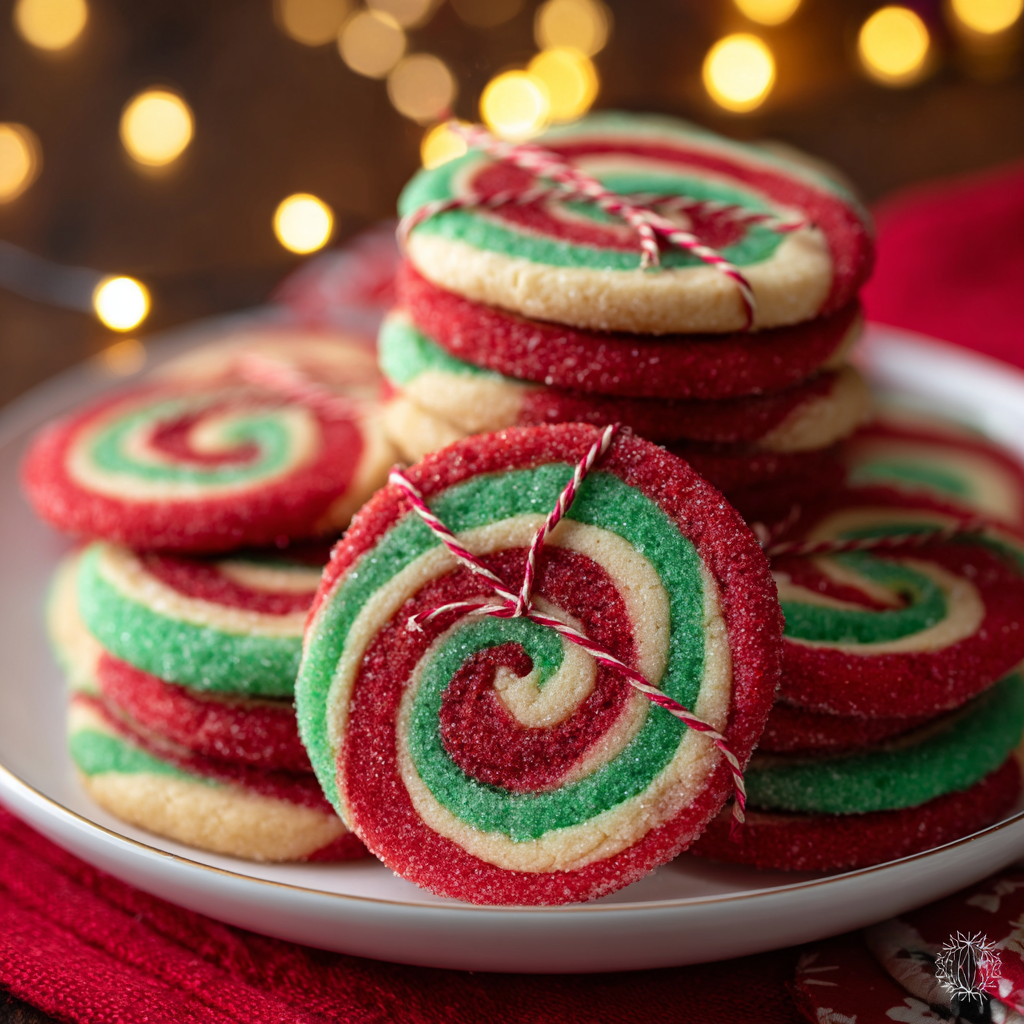
These cookies look beautiful when arranged in a circular pattern on a festive platter or stacked in clear boxes tied with ribbon for gifting. Pair with hot cocoa, spiced tea, or a mild coffee for a classic holiday spread. For a dessert board, combine with ginger snaps, shortbread, and chocolate-dipped pretzels to create contrast in textures and flavors. Garnish with edible gold dust sparingly for an upscale presentation at formal gatherings.
Pinwheel cookies are an Americanized decorative variant of rolled sugar cookies, inspired by European rolled confections that use layered dough for visual effect. They became particularly popular in the United States during the mid-20th century with the rise of colorful food coloring and household baking as part of holiday traditions. Over time, home bakers adapted the technique for festive occasions, creating color schemes and flavors that reflect regional holidays and family customs.
For winter holidays, keep the classic red-and-green palette. For other seasons, change the colors: pastel pink and mint for spring, orange and brown for autumn, or red and gold for Lunar New Year. Swap vanilla for almond extract for a nuttier profile, or add a teaspoon of orange zest to the plain layer for a citrus brightness. If you want a Halloween version, color one layer black with gel and roll the edges in orange sanding sugar.
Make several logs in advance, wrap them tightly in parchment and plastic, then freeze. When you want fresh cookies, slice from frozen and bake without thawing, adding a minute or two to the bake time if needed. Portion dough into smaller logs before freezing to control batch sizes and reduce thaw time. Use a serrated knife and a gentle sawing motion to get clean, even slices; wipe the blade between cuts for neater edges.
These cookies are a small, joyful reminder that simple techniques can yield elegant results. Whether you’re baking for a swap, a school party, or family dessert plates, these pinwheels invite creativity and are a delightful way to celebrate the season.
Chill the dough thoroughly — the one-hour freeze after rolling is critical to maintain the spiral during slicing.
Use gel food coloring to avoid altering dough moisture; start with a small amount and build to the desired shade.
Roll the log tightly and evenly; any air pockets can cause the spiral to separate while baking.
Wrap logs tightly in parchment and plastic when freezing to prevent freezer burn.
When slicing, use a sharp serrated knife and rotate the log slightly between cuts for consistent thickness.
This nourishing christmas pinwheel cookies recipe is sure to be a staple in your kitchen. Enjoy every moist, high protein slice — it is perfect for breakfast or as a wholesome snack any time.
Yes — you can freeze the wrapped dough log for up to 3 months. Slice and bake from frozen, adding a minute or two to the bake time if necessary.
Use a serrated knife and a slow sawing motion. Clean the blade between cuts for the cleanest slices.
This Christmas Pinwheel Cookies recipe makes perfectly juicy, tender, and flavorful steak every time! Serve with potatoes and a side salad for an unforgettable dinner in under 30 minutes.
Beat 2/3 cup softened unsalted butter and 2/3 cup granulated sugar in a stand mixer with the paddle attachment for 3–4 minutes on medium speed until pale and fluffy. Scrape the bowl once to ensure even mixing.
Add 1 large room-temperature egg and 1 teaspoon vanilla extract, mixing until combined and glossy. Mix on low to avoid splashing.
Whisk together 1 3/4 cups all-purpose flour, 1/2 teaspoon kosher salt, and 1/4 teaspoon baking soda. Add gradually to the mixer on low speed until just combined to avoid overworking the dough.
Divide the dough into three equal parts. Color one part red and one part green using gel food coloring, leaving the third uncolored. Shape into balls, wrap in plastic, and refrigerate for 1 hour.
Roll each chilled ball between parchment into a 7-inch square. Chill sheets for 15 minutes. Stack in the order red, green, plain on fresh parchment and roll to a 12×8-inch rectangle.
Remove top parchment, roll tightly from a long edge into a log, wrap in parchment, and freeze for 1 hour. Freezing helps maintain the spiral when slicing and baking.
Preheat oven to 350°F. Using a serrated knife, slice the log into 1/3-inch-thick cookies. Roll the edges of each slice in red sanding sugar and place 1 inch apart on parchment-lined baking sheets.
Bake for 8–10 minutes until set but not browned. Cool on the baking sheet for 1 minute, then transfer to a wire rack to cool completely before storing in an airtight container.
Last Step: Please leave a rating and comment letting us know how you liked this recipe! This helps our business to thrive and continue providing free, high-quality recipes for you.
Leave a comment & rating below or tag
@galovicooking on social media!
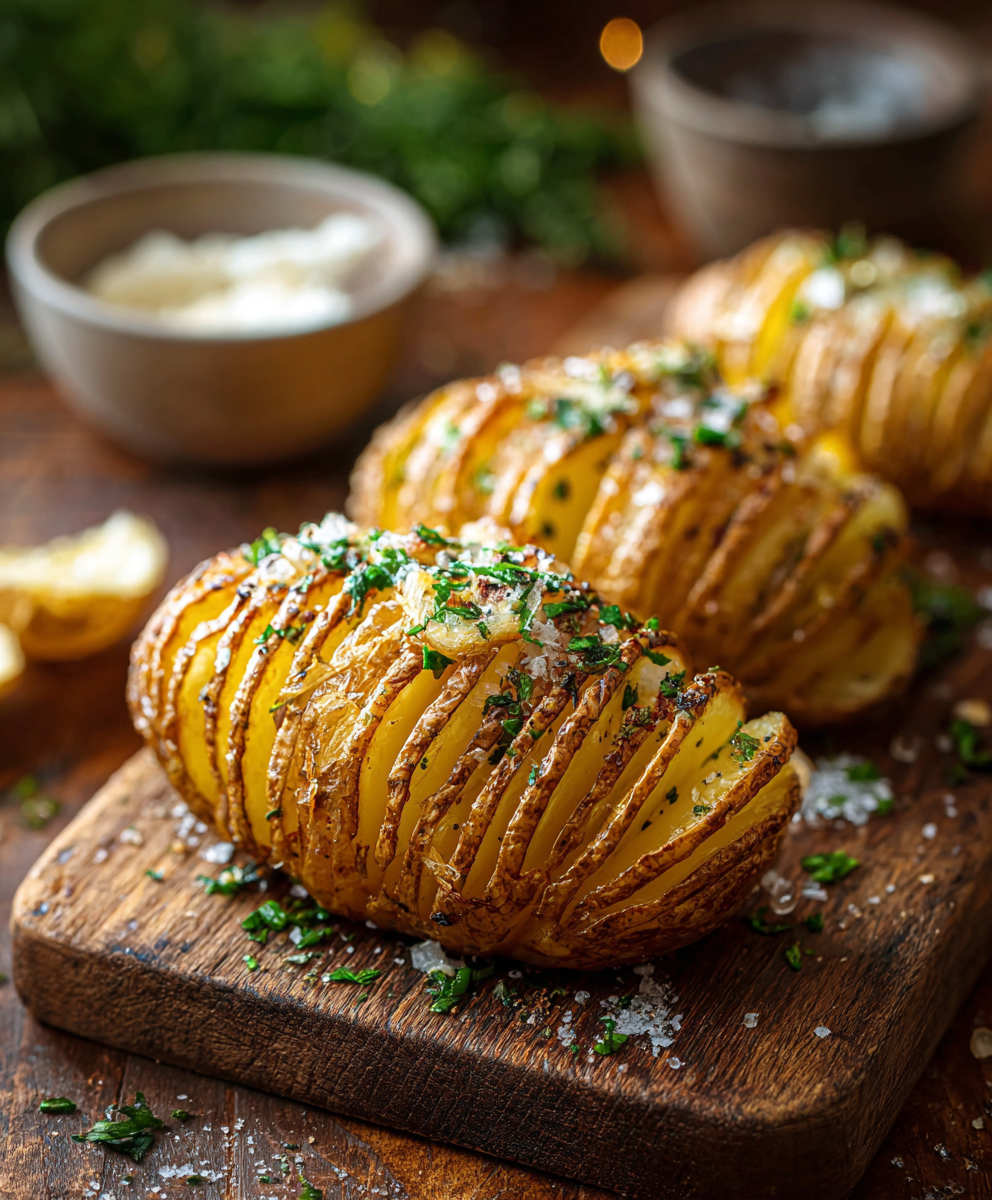
Crispy on the outside, tender inside: classic Hasselback potatoes brushed with melted butter and seasoned simply with kosher salt and pepper.
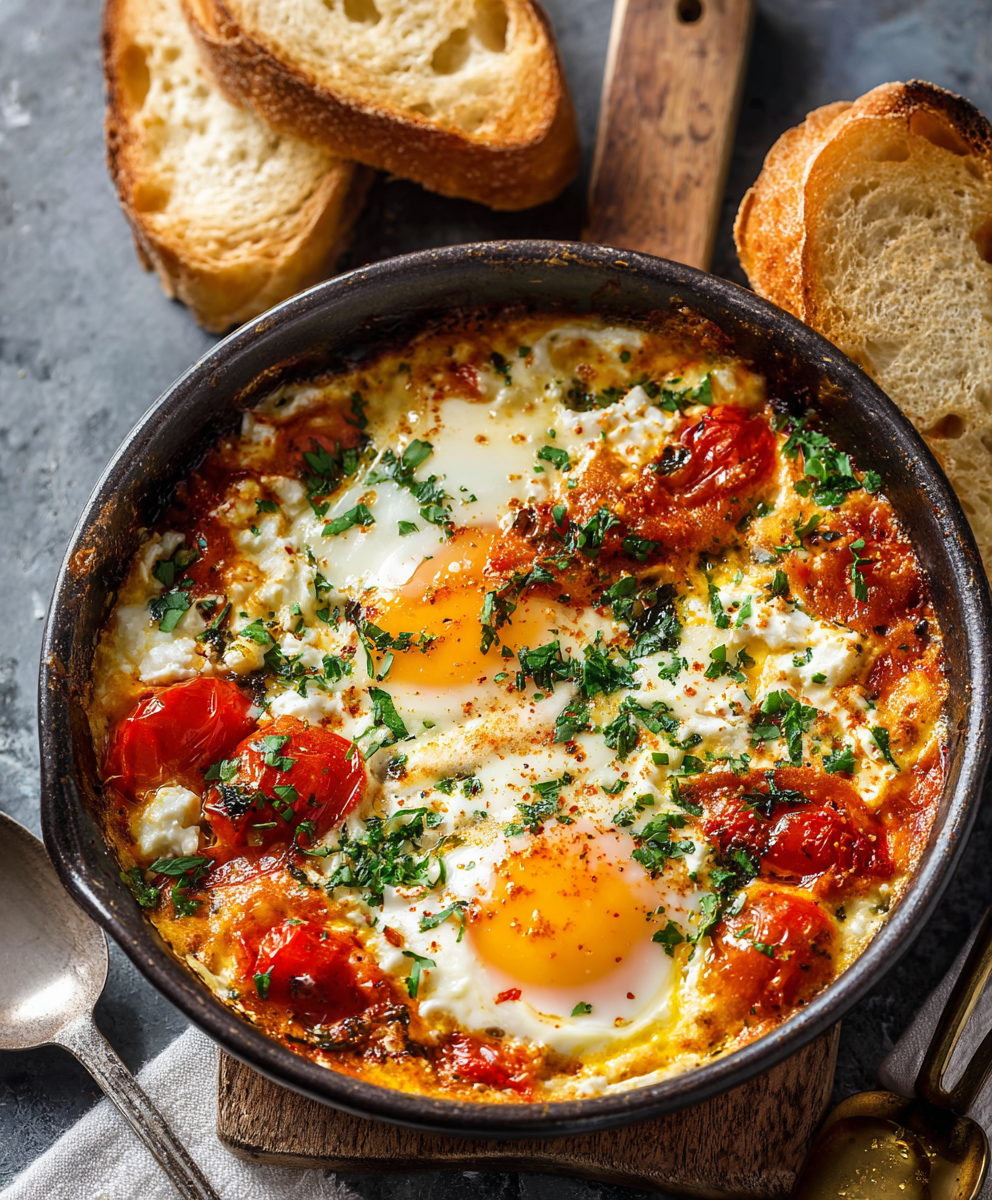
A comforting Mediterranean-inspired bake of roasted tomatoes, feta, spinach, and eggs — creamy, savory, and perfect for breakfast, brunch, or an easy weeknight meal.

A bright, tangy frozen treat that channels key lime pie in a protein-packed, freezer-ready bark — perfect for warm days, snack prep, and a lighter dessert.
Leave a comment & rating below or tag @galovicooking on social media!
Enjoyed this recipe? Share it with friends and family, and don't forget to leave a review!
This recipe looks amazing! Can't wait to try it.
Comments are stored locally in your browser. Server comments are displayed alongside your local comments.

Join to receive our email series which contains a round-up of some of our quick and easy family favorite recipes.