Gnome Mini Cheesecakes

Tiny, whimsical cheesecakes topped with marzipan gnome hats and bright berries — perfect for parties, gifts, and cozy evenings.
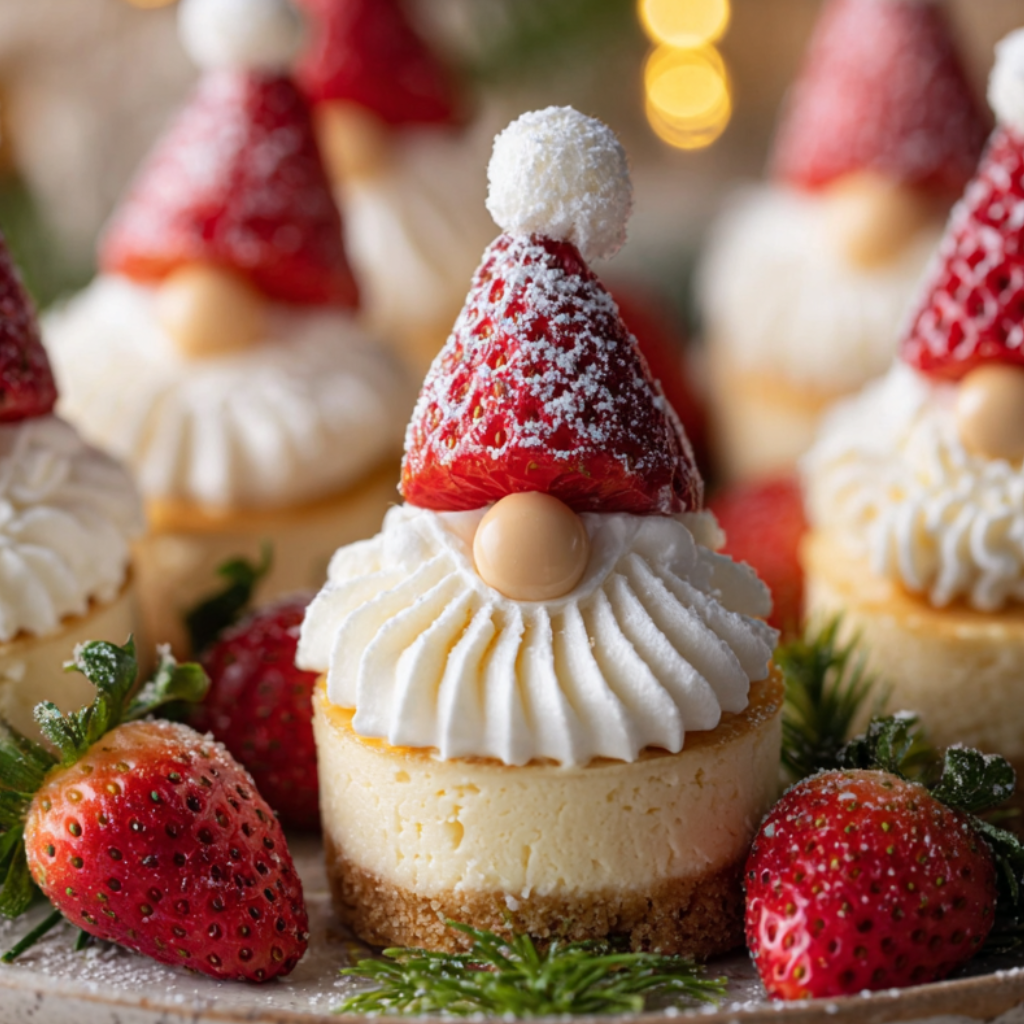
This recipe for Gnome Mini Cheesecakes began as a playful experiment the first winter I wanted to bring a little magic to holiday baking. I was inspired by Scandinavian marzipan figurines and my grandmother’s classic cheesecake, and what started as a way to entertain kids became a favorite for grown-ups too. These bite-sized treats are creamy, just sweet enough, and crowned with little gnome hats that make every plate feel festive. I discovered the ideal balance of tang from cream cheese and sweetness from a vanilla-scented filling while testing different crusts; the final version uses a buttery graham base that crisps slightly around the edges after baking.
What I love most is how versatile they are: you can batch-make the filling ahead, freeze the unbaked cups, or decorate them differently for birthdays, showers, or whimsy-themed gatherings. The texture is dense yet light — a delicate melt in the mouth with a slight caramelization on the crust when baked just right. Family reactions ranged from delighted squeals (because of the gnome hats) to silent reverent chewing from cheesecake purists. These mini portions make sharing easy and keep clean-up minimal — a small, thoughtful dessert with big personality.
Why You'll Love This Recipe
- Make-ahead friendly: the filling keeps 2 days in the refrigerator and unbaked mini cups freeze for up to 1 month.
- Quick portion control: yields about 12 minis, perfect for small gatherings or as individual gifts.
- Accessible ingredients: uses pantry staples like graham crackers, cream cheese, eggs, and vanilla — no specialty items required.
- Decorative impact: marzipan or fondant gnome hats transform a simple dessert into a memorable centerpiece.
- Time efficient: active prep about 20 minutes, baking and cool time fit into a party day timeline (total roughly 1 hour 15 minutes).
- Kid-friendly assembly: small hands can press crusts and place decorations, making this a fun family project.
In my kitchen this became the go-to when I needed a quick but charming dessert. Once I brought a tray to a neighborhood potluck and people kept asking where I bought them; I loved saying, "I made them myself." The combination of approachable technique and show-stopping presentation makes these a repeat at holidays and garden parties alike.
Ingredients
- Graham cracker crumbs (crust): Use 1 1/2 cups finely crushed graham crackers (about 9 full sheets). Choose a brand with a hint of honey for depth — it crisps nicely and balances the tang.
- Unsalted butter: 6 tablespoons, melted, to bind the crumbs and create a buttery base. Salted butter works if you prefer a savory lift; reduce added salt in the filling.
- Cream cheese: Two 8-ounce blocks (16 ounces total) at room temperature. Full-fat yields the creamiest texture; Philadelphia is a reliable brand for consistent results.
- Sour cream: 1/3 cup to give a slight tang and silkiness. Greek yogurt (plain, whole-milk) is a great substitute if you want a lighter tang.
- Granulated sugar: 2/3 cup for balanced sweetness; superfine sugar dissolves fastest for ultra-smooth filling.
- Large egg: 1 whole plus 1 egg yolk for richness and structure without over-aerating.
- Pure vanilla extract: 1 teaspoon; high-quality vanilla makes a noticeable difference in depth of flavor.
- Fresh lemon juice: 1 teaspoon to brighten flavors — optional but recommended for balance.
- Marzipan or fondant: Small amounts (about 3 ounces) to sculpt tiny gnome hats, or use store-bought marzipan candy shapes.
- Fresh berries and edible glitter: For garnish; raspberries, blueberries, or tiny mint leaves add color and freshness.
Instructions
Prepare equipment and room temperature ingredients: Preheat oven to 325°F. Bring cream cheese and eggs to room temperature — this prevents lumps and ensures a silky filling. Line a standard 12-cup muffin tin with paper liners or silicone cups for easy release. If using a water bath, place a roasting pan on the oven rack below to add hot water later. Make the crust: Combine 1 1/2 cups graham cracker crumbs with 2 tablespoons of sugar and 6 tablespoons melted butter in a bowl. The mixture should clump when pressed between fingers. Press about 1 tablespoon into the bottom of each lined cup to form an even layer, using the back of a small measuring cup to compact it. Chill the pan 10 minutes to set the crust before filling. Blend the filling: Beat 16 ounces cream cheese with 2/3 cup granulated sugar on medium speed until smooth, about 2 minutes. Scrape the bowl, add 1/3 cup sour cream, 1 teaspoon vanilla, and 1 teaspoon lemon juice; mix until combined. Add 1 whole egg and 1 yolk and mix on low just until incorporated — overmixing adds air and can cause cracks. Fill the cups: Spoon the filling over the chilled crusts, filling each cup nearly to the top but leaving a small gap for slight rise (about 3/4 full). Tap the pan gently on the counter to release air bubbles. For perfectly smooth tops, run a small offset spatula over each cup. Optional water bath and bake: If using a water bath, place the filled muffin tin inside a larger roasting pan and pour boiling water into the roasting pan to come halfway up the muffin tin sides. Bake at 325°F for 18–22 minutes, or until centers are set but slightly jiggly. Minis will firm as they cool; avoid overbaking to prevent dryness. Cool and chill: Remove from oven, lift the muffin tin out of the water bath (if used) and cool on a wire rack 20 minutes. Transfer liners with minis to the refrigerator and chill at least 2 hours, ideally overnight. Chilling improves texture and makes decorating easier. Decorate like gnomes: Shape tiny cones from marzipan or fondant for hats, tint if desired with a few drops of food coloring, and place on chilled minis. Add a small dot of cream or a berry beneath the hat for a nose, and dust with edible glitter for a whimsical finish.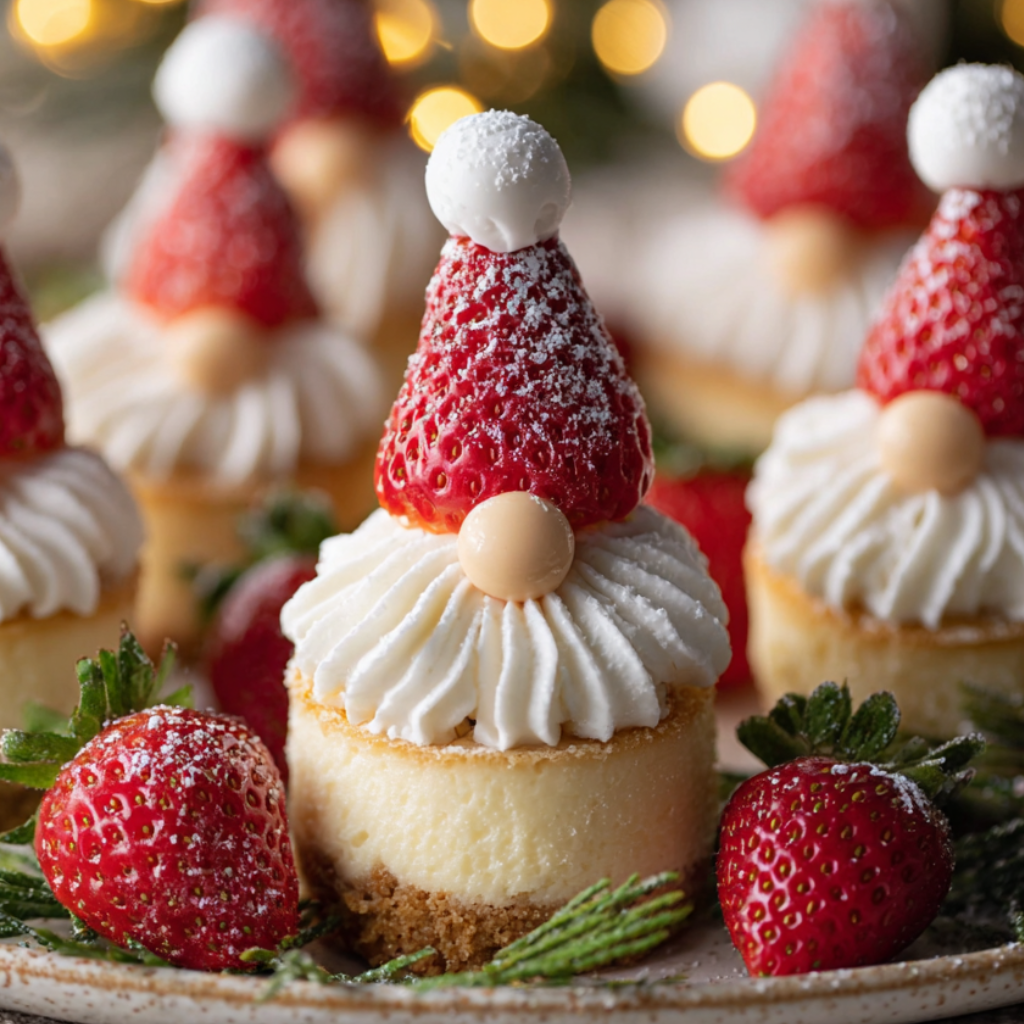
You Must Know
- Chill thoroughly: refrigeration firms texture and improves slicing; overnight is best for clean presentation.
- Room temperature ingredients avoid lumps: cold cream cheese can make a grainy filling.
- Water bath reduces cracking: steam creates gentle heat and even baking for a smooth surface.
- Freeze before transport: frozen minis are easier to stack and travel well; thaw 20 minutes before serving.
- Ingredient swaps change texture: Greek yogurt lightens the filling but adds tang.
My favorite aspect is how these transform simple gatherings into memories — kids volunteering to place berries, friends debating hat colors, and neighbors requesting the recipe by the dozen. The tiny size encourages tasting and chatter, and seeing people smile at a miniature gnome perched on a cheesecake is a small joy I never tire of.

Storage Tips
Store chilled minis in an airtight container in the refrigerator for up to 5 days; place parchment between layers to protect decorations. For longer storage, freeze on a tray until solid, then transfer to a sealed freezer-safe container for up to 3 months. Thaw in the refrigerator for several hours before serving, or at room temperature for 20–30 minutes for creamier texture. When transporting, keep them on a flat surface with an ice pack underneath to preserve shape and decorations.
Ingredient Substitutions
For a gluten-free version, swap graham crumbs for gluten-free graham or almond flour — use 1 1/4 cups almond flour plus 2 tablespoons sugar and 5 tablespoons melted butter for a slightly nutty base. To reduce sugar, use 1/2 cup granulated sugar and 2 tablespoons maple syrup; expect a slightly denser texture. Vegan adaptations can use vegan cream cheese and aquafaba in place of eggs, but textures will differ and require additional chilling to firm properly.
Serving Suggestions
Serve minis on a tiered platter with fresh berries, mint, and a small dusting of powdered sugar. For holiday tables, pair with spiced tea or mulled wine; spring gatherings love citrus curd and candied flowers. Use different colored hats to indicate flavors — red for raspberry, green for pistachio — and offer small dessert forks or bamboo picks for easy eating.
Cultural Background
Cheesecake has deep international roots, from ancient Greek honey cakes to New York’s dense, creamy style. These mini versions combine classic American cheesecake technique with decorative elements inspired by northern European marzipan figures and festive Scandinavian sweets. The concept of individually portioned cakes has grown in popularity for modern entertaining, reflecting a desire for variety and easy plating.
Seasonal Adaptations
Change toppings with the seasons: late summer uses stone fruit slices and basil, fall favors spiced apple compote and cinnamon hats, and winter highlights pomegranate arils and peppermint dust. For Easter, pastel-colored hats and lemon zest weave seasonal brightness into the filling itself. Adjust baking times minimally for variations with extra moisture, such as fruit-swirl additions.
Meal Prep Tips
Prepare crust and filling up to 24 hours ahead; keep crusts chilled and filling refrigerated in an airtight bowl. For busy hosts, assemble and freeze unbaked filled cups; bake from frozen, adding 4–6 minutes to the bake time and checking for a gentle jiggle in the center. Label containers with dates and flavor variations to streamline service during events.
These tiny cakes bring charm and practicality to any table. Whether you make them for a small family dessert or as a whimsical party detail, the process of shaping, baking, and decorating is as rewarding as the first bite. I hope you find as much delight in creating them as I do in sharing them.
Pro Tips
Always bring cream cheese and eggs to room temperature to avoid lumps in the filling.
Use a water bath to reduce surface cracking and ensure even baking.
Tap the filled cups to release air bubbles before baking for smooth tops.
Chill completely before decorating to prevent hats from slipping.
If using marzipan, dust a touch of cornstarch to prevent sticking while shaping.
This nourishing gnome mini cheesecakes recipe is sure to be a staple in your kitchen. Enjoy every moist, high protein slice — it is perfect for breakfast or as a wholesome snack any time.
FAQs about Recipes
How long should I chill the mini cheesecakes?
Chill at least 2 hours; overnight is best for firm texture and easy decoration.
Can I freeze the mini cheesecakes?
Yes — freeze on a tray until solid, then transfer to a sealed container for up to 3 months.
Tags
Gnome Mini Cheesecakes
This Gnome Mini Cheesecakes recipe makes perfectly juicy, tender, and flavorful steak every time! Serve with potatoes and a side salad for an unforgettable dinner in under 30 minutes.
Ingredients
Crust
Filling
Decorations
Instructions
Prepare equipment and ingredients
Preheat oven to 325°F. Line a 12-cup muffin tin with liners or silicone cups. Bring cream cheese and eggs to room temperature to ensure a smooth filling.
Make the crust
Combine graham cracker crumbs, sugar, and melted butter. Press about 1 tablespoon into each lined cup to form an even layer. Chill 10 minutes to set.
Blend the filling
Beat cream cheese and sugar until smooth, add sour cream, vanilla, and lemon juice. Mix in whole egg and yolk on low speed until just combined to avoid air incorporation.
Fill and tap
Spoon filling into chilled crusts about 3/4 full. Tap the pan to release air bubbles and smooth tops with a small spatula.
Bake in a water bath (optional)
Place filled tin in a larger pan and pour boiling water halfway up the tin sides. Bake 18–22 minutes at 325°F until centers are set but slightly jiggly.
Cool and chill
Cool on a wire rack 20 minutes, then refrigerate at least 2 hours or overnight to firm and develop flavor.
Shape hats and decorate
Form small cones from marzipan or fondant, tint if desired, and place on chilled minis. Add a berry for a nose and dust with edible glitter.
Serve
Keep chilled until service; serve on a platter with extra berries and mint. Thaw frozen minis in the refrigerator before serving.
Last Step: Please leave a rating and comment letting us know how you liked this recipe! This helps our business to thrive and continue providing free, high-quality recipes for you.
Nutrition
Did You Make This?
Leave a comment & rating below or tag
@galovicooking on social media!
Categories:
You might also like...
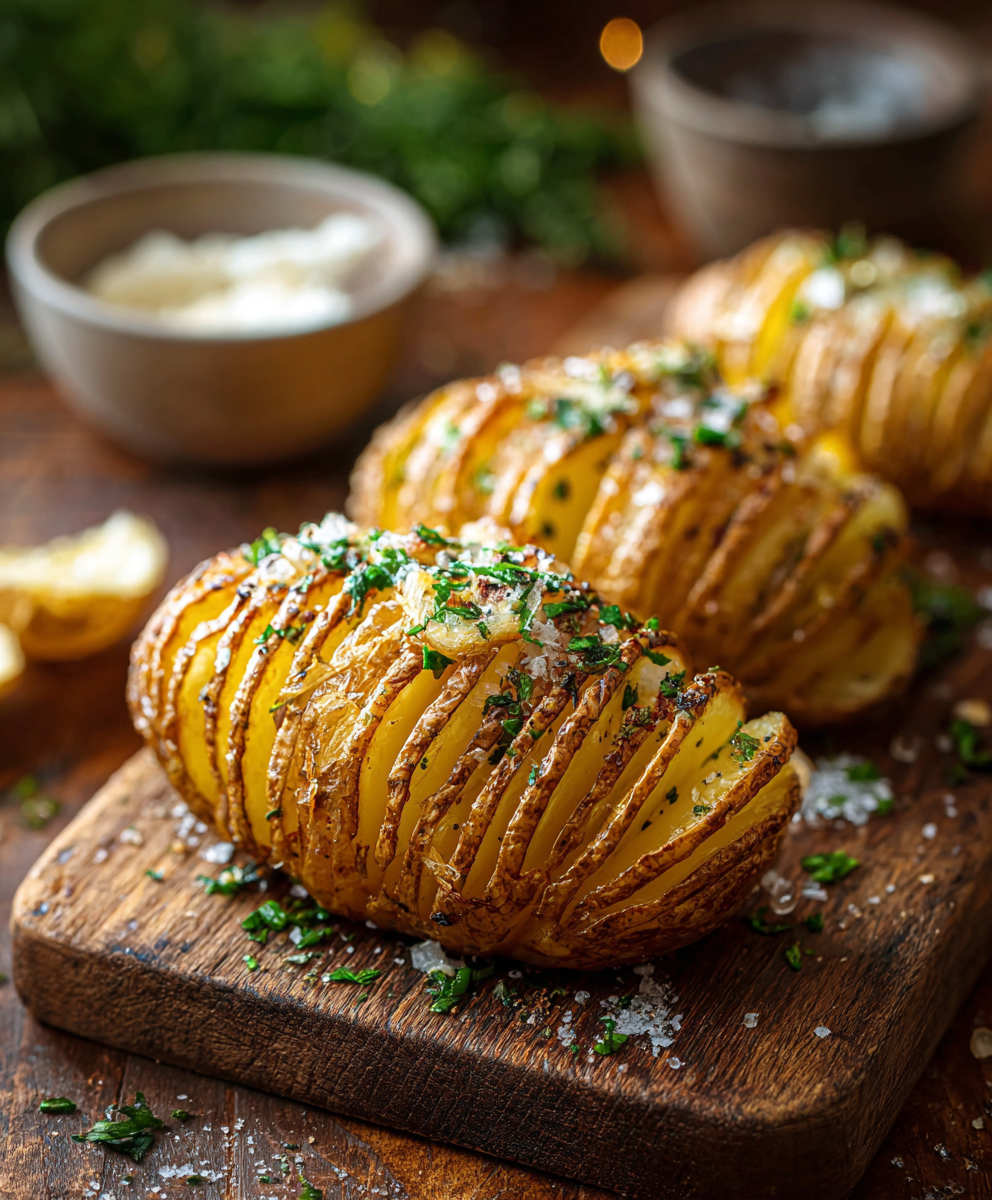
Classic Hasselback Potatoes
Crispy on the outside, tender inside: classic Hasselback potatoes brushed with melted butter and seasoned simply with kosher salt and pepper.
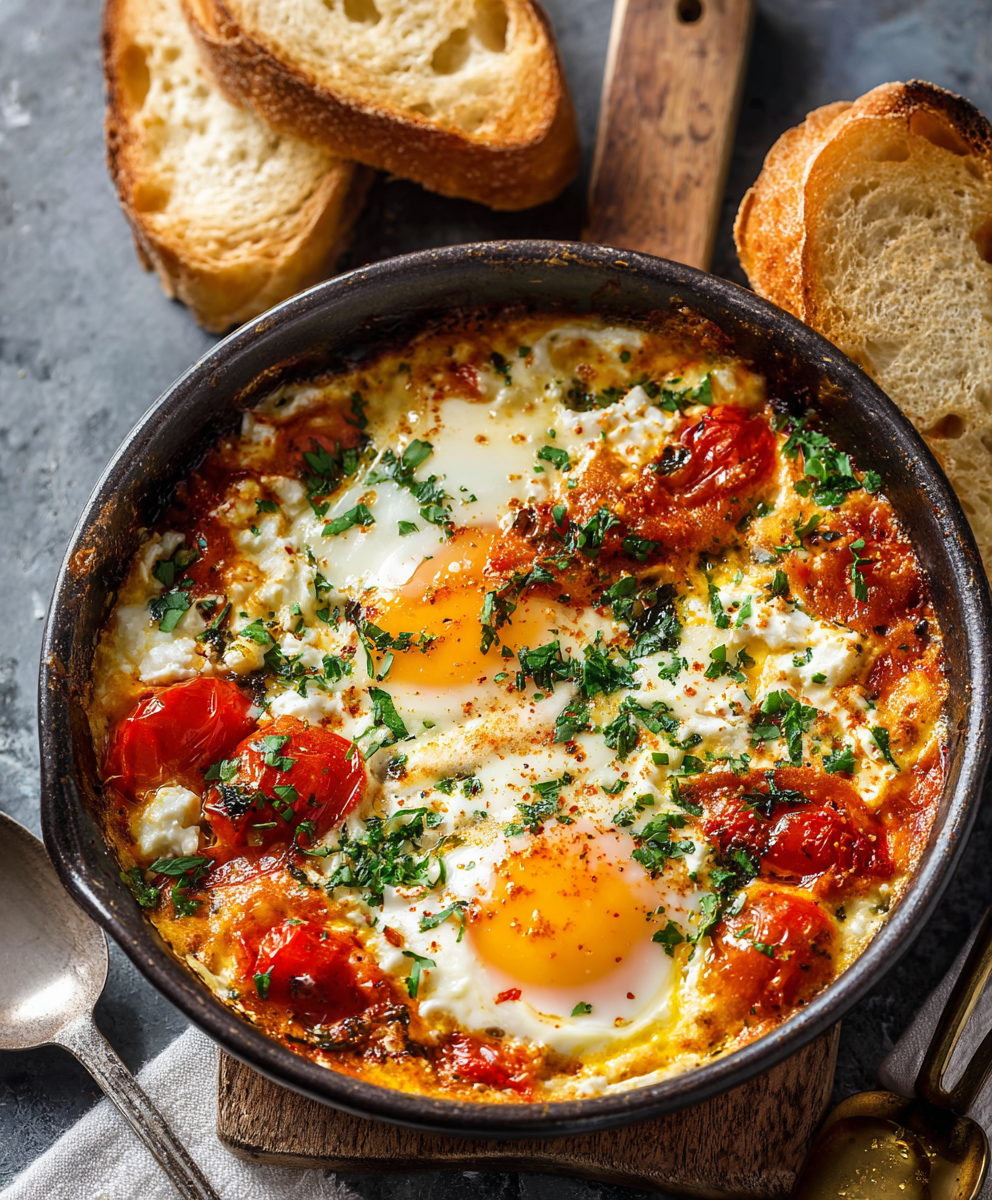
Baked Feta Eggs
A comforting Mediterranean-inspired bake of roasted tomatoes, feta, spinach, and eggs — creamy, savory, and perfect for breakfast, brunch, or an easy weeknight meal.

Key Lime Pie Yogurt Bark
A bright, tangy frozen treat that channels key lime pie in a protein-packed, freezer-ready bark — perfect for warm days, snack prep, and a lighter dessert.
Did You Make This?
Leave a comment & rating below or tag @galovicooking on social media!
Rate This Recipe
Share This Recipe
Enjoyed this recipe? Share it with friends and family, and don't forget to leave a review!
Comments (1)
This recipe looks amazing! Can't wait to try it.
Comments are stored locally in your browser. Server comments are displayed alongside your local comments.

Hi, I'm Ava!
What's Popular
30-Minute Meals!
Join to receive our email series which contains a round-up of some of our quick and easy family favorite recipes.