>>
30-MINUTE MEALS! Get the email series now →

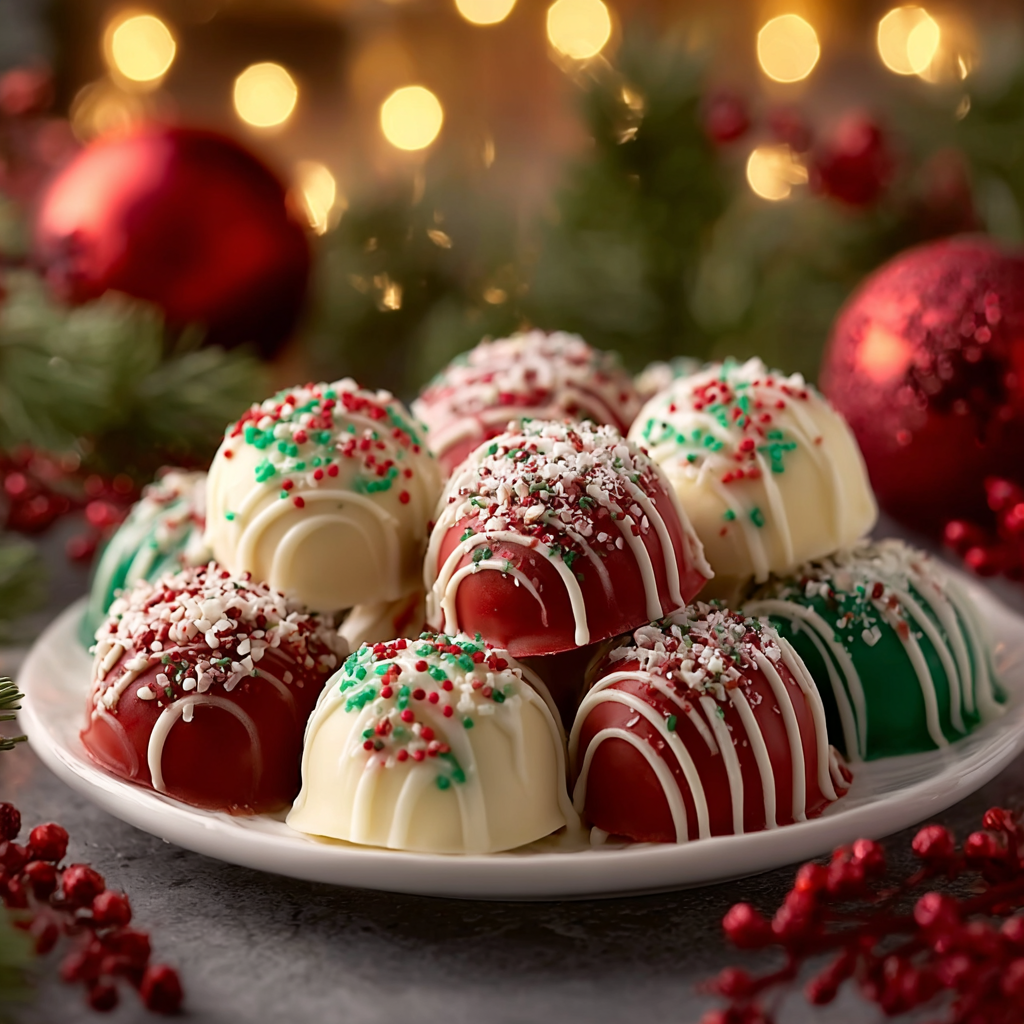
Tiny festive cheesecake bites coated in colored chocolate and sprinkles — no oven, fast chill time, and perfect for holiday parties.

This no-bake Christmas cheesecake bites recipe has become my go-to dessert when the calendar fills with holiday gatherings. I discovered this idea one December evening while trying to translate our favorite full-size cheesecake into something bite-sized and party-friendly. The result was irresistible: a creamy, tangy filling rounded with crunchy crumbs and dressed in festive red and green coating that made even the pickiest holiday guests smile. It is the sort of sweet that disappears off the platter faster than you can refill it.
What makes these little treats special is the contrast of textures and the ease. The filling is luxuriously smooth thanks to softened cream cheese and melted white chocolate, tempered by the lightness of whipped topping and the subtle crunch of graham crumbs. They travel well, keep their shape in cool environments, and take just a few hands-on minutes before a short chill. I make them for cookie exchanges, office parties, and whenever the neighborhood potluck calls for something pretty and simple to eat with one hand.
I remember bringing a tray to a neighborhood cookie exchange and watching neighbors debate whether to pick the red or green ones first. My sister declared them “the prettiest thing on the table,” and a co-worker asked for the recipe on the spot. That reaction is why I keep this method in my holiday repertoire.
My favorite part of this method is how forgiving it is. Once you master the right chill time and consistency, decoration becomes a joyful, almost craft-like exercise. One year I let my kids choose sprinkle combos and they declared the red-sprinkled ones “superhero bites,” which was the highest compliment in their book.

Store the bites in an airtight container lined with parchment paper, separating layers so coatings do not stick. Refrigerate for up to 4 days; the coating may become slightly softer over time but the filling stays reliably creamy. For longer storage, freeze on a tray until solid then transfer to a freezer-safe container with parchment between layers for up to 3 months. Thaw in the refrigerator for several hours before serving to maintain texture. Avoid leaving them at room temperature for extended periods if your coating contains dairy-based chocolate.
If you need a gluten-free option, substitute gluten-free graham-style crumbs or crushed gluten-free sandwich cookies in equal measure. For a dairy-free version, use dairy-free cream cheese and a stabilized coconut whipped topping, and select dairy-free white chocolate alternatives; expect a slightly different mouthfeel. Swap crushed Oreos for graham crackers for a cookies-and-cream twist and reduce powdered sugar slightly if your cookies are sweet. Use almond extract in place of vanilla for a nuttier profile, but lower the amount to 1/2 teaspoon to prevent overpowering the filling.
Arrange the bites on a festive platter with greenery and small scoops of additional sprinkles for dipping. Pair them with strong coffee, mulled wine, or a bright citrus punch — the tang of the filling balances sweet beverages beautifully. For a dessert table, place them next to shortbread and fruit tarts for textural contrast. Garnish with tiny mint leaves or edible gold dust for an upscale holiday presentation.
Miniature no-bake cheese confections have become popular in American holiday baking as an accessible way to offer cheesecake-like flavors without the fuss of baking. They borrow from traditions of molded confections and truffles and have been adapted into seasonal color schemes for celebrations. Their rise in popularity coincides with modern preferences for shareable, bite-sized party foods that travel well and are easy to portion for gatherings.
Change the coating colors and sprinkles for other holidays: pastel coatings for spring or metallics for New Year celebrations. In summer, swap the white chocolate for dark chocolate and top with toasted coconut; in autumn, add a pinch of cinnamon and swap the graham crumbs for gingersnap crumbs. For Valentines, use pink coating and heart-shaped sprinkles.
Make the filling two days ahead and keep it chilled; shape and coat on the day you plan to serve for peak appearance. Use a small cookie scoop for uniform bites and chill scooped balls on a tray while you melt coatings. If you are making a large batch, work in batches of 24 to avoid melted coatings setting before you finish decorating. Pack finished bites in single layers with parchment to prevent sticking when transporting.
These little treats are a holiday companion I make every year. They capture festive colors, deliver the creamy tang of cheesecake in bite form, and free up oven space for main dishes. I hope you enjoy making them as much as my family enjoys eating them.
Use full-fat cream cheese and bring it to room temperature for the smoothest filling.
Melt white chocolate in short bursts and let cool slightly before combining to avoid separation.
Chill the mixture before shaping and use a small cookie scoop for uniform bites.
Work quickly when coating and add sprinkles while the coating is still wet for best adhesion.
This nourishing no-bake christmas cheesecake bites recipe is sure to be a staple in your kitchen. Enjoy every moist, high protein slice — it is perfect for breakfast or as a wholesome snack any time.
Chill the mixture for at least 30 minutes so it firms up enough to roll into balls. If too soft, chill another 10 to 15 minutes.
Freeze on a tray until solid, then transfer to a freezer container for up to 3 months. Thaw in the refrigerator before serving.
This No-Bake Christmas Cheesecake Bites recipe makes perfectly juicy, tender, and flavorful steak every time! Serve with potatoes and a side salad for an unforgettable dinner in under 30 minutes.
Beat softened cream cheese until smooth, then add powdered sugar and vanilla. Mix until silky and free of lumps.
Melt white chocolate chips in short microwave bursts, stirring until glossy. Let cool slightly before adding to the cream cheese to avoid seizing.
Stir in crushed graham crackers, then gently fold in thawed whipped topping to maintain a light texture while providing structure.
Refrigerate the mixture for 30 to 40 minutes, scoop into 1-inch balls, and place on parchment-lined sheet. Chill if too soft to hold shape.
Melt red and green candy melts separately, dip each ball, tap off excess, and decorate with sprinkles while coating is wet. Let set.
Last Step: Please leave a rating and comment letting us know how you liked this recipe! This helps our business to thrive and continue providing free, high-quality recipes for you.
Leave a comment & rating below or tag
@galovicooking on social media!
Crispy on the outside, tender inside: classic Hasselback potatoes brushed with melted butter and seasoned simply with kosher salt and pepper.

A comforting Mediterranean-inspired bake of roasted tomatoes, feta, spinach, and eggs — creamy, savory, and perfect for breakfast, brunch, or an easy weeknight meal.

A bright, tangy frozen treat that channels key lime pie in a protein-packed, freezer-ready bark — perfect for warm days, snack prep, and a lighter dessert.
Leave a comment & rating below or tag @galovicooking on social media!
Enjoyed this recipe? Share it with friends and family, and don't forget to leave a review!
This recipe looks amazing! Can't wait to try it.
Comments are stored locally in your browser. Server comments are displayed alongside your local comments.

Join to receive our email series which contains a round-up of some of our quick and easy family favorite recipes.