Onion Ring Chips

Crispy, golden onion ring chips coated with buttermilk, seasoned flour, and panko for an extra-crunchy bite — perfect for parties or weeknight snacking.

This recipe for onion ring chips sprang from a late-night craving and a box of panko in my pantry. I wanted the crunch of a fairground ring but with a lighter, chip-like feel that’s easy to snack on. I sliced two large onions into thin 1/4-inch rings and tested a coating method that starts with a seasoned flour dredge, a tangy buttermilk soak, and a double-coat of panko. The result is a batch of crisp, golden chips with a tender, sweet onion center and an irresistible crunch that keeps everyone reaching for more.
I first made these on a rainy Saturday when friends popped by unexpectedly. They disappeared in minutes and earned immediate praise — one guest asked for the recipe before leaving. The texture is the standout: delicate, slightly sweet onions surrounded by a crunchy, almost cracker-like shell. These are ideal for serving with classic ketchup, a garlic aioli, or a smoky barbecue dip. They are quick to make, and the technique is forgiving, so they’re great for cooks at any skill level.
Why You'll Love This Recipe
- Ready in about 30 minutes from prep to finish, which makes them perfect for last-minute guests or quick snacks.
- Uses pantry-friendly ingredients like all-purpose flour, panko breadcrumbs, and common spices so you rarely need a special shopping trip.
- Buttermilk in the soak adds subtle tang and helps the coating cling for an extra-crisp finish.
- The double-coating method — flour, buttermilk, then panko — creates a hearty crunch while keeping the onion tender inside.
- Easy to scale up for a party platter or scale down for a household snack, and they pair well with both casual and elevated dips.
- Versatile: suitable for afternoon snacking, game-day finger food, or a side to smoky sandwiches.
When I perfected this method, I realized how forgiving the process is: even if your oil temperature dips a bit, the panko holds up and produces an acceptable crisp. My family now expects these at every gathering; they’re the first thing to go.
Ingredients
- Onions: Use 2 large yellow or sweet onions, sliced into 1/4-inch rings. Look for firm bulbs without soft spots; sweet varieties like Vidalia add a mellow finish, while yellow onions give a more classic savory note.
- All-purpose flour: 1 cup — this forms the first dry coating that helps the buttermilk adhere. King Arthur or any unbleached all-purpose flour works well.
- Garlic powder: 1 teaspoon for a subtle savory lift; powdered garlic distributes evenly in the flour mix.
- Paprika: 1 teaspoon — use smoked paprika for a smoky edge, or sweet paprika for milder flavor.
- Salt: 1/2 teaspoon. Kosher salt is preferred for even seasoning; adjust to taste.
- Black pepper: 1/2 teaspoon freshly ground for warmth and a slight bite.
- Buttermilk: 1 cup — helps the panko stick and adds a gentle tang that balances the onion’s sweetness. If you don’t have buttermilk, make a quick substitute with 1 cup milk plus 1 tablespoon vinegar or lemon juice, rested for 5 minutes.
- Panko breadcrumbs: 2 cups — Japanese-style panko gives an airy, flaky crunch unmatched by regular breadcrumbs.
- Vegetable oil: For frying — a neutral oil with a high smoke point such as canola, sunflower, or peanut oil. You need enough to maintain a 2-inch depth in your frying vessel.
Instructions
Prepare the onions:Peel and slice 2 large onions into 1/4-inch rings. Separate rings and set them on a towel to blot away excess moisture — drier rings pick up coatings better and fry crisper. If some rings stick together, gently pry them apart with a paring knife.Make the seasoned flour:Whisk together 1 cup all-purpose flour, 1 teaspoon garlic powder, 1 teaspoon paprika, 1/2 teaspoon salt, and 1/2 teaspoon black pepper in a wide bowl. Taste a bit of the mix to check seasoning — it should be slightly more seasoned than you think; frying mutes flavors.Soak in buttermilk:Pour 1 cup buttermilk into a shallow bowl and add the onion rings, gently tossing so each ring is coated. Let rings sit 5 minutes so the tangy milk clings and softens the onion slightly, helping the crust adhere during frying.Set up dredging station:Place the seasoned flour in one bowl, the buttermilk-soaked rings in another, and 2 cups panko breadcrumbs in a third. Work in small batches: dredge each ring in flour, dip back in buttermilk, then press into panko until well coated. For an extra-crisp shell, repeat the buttermilk and panko step for a double coat.Heat the oil and fry:Pour vegetable oil into a deep pan to a depth of about 2 inches and heat to 350°F (use a candy or deep-fry thermometer for accuracy). Fry rings in small batches for 2 to 3 minutes, turning once, until golden brown. Avoid overcrowding, which drops oil temperature and results in soggy coating.Drain and season:Use a slotted spoon to transfer rings to a rack or paper towels to drain. Season lightly with a pinch of salt while hot. Let rest a minute to set the crust before serving with your favorite dip.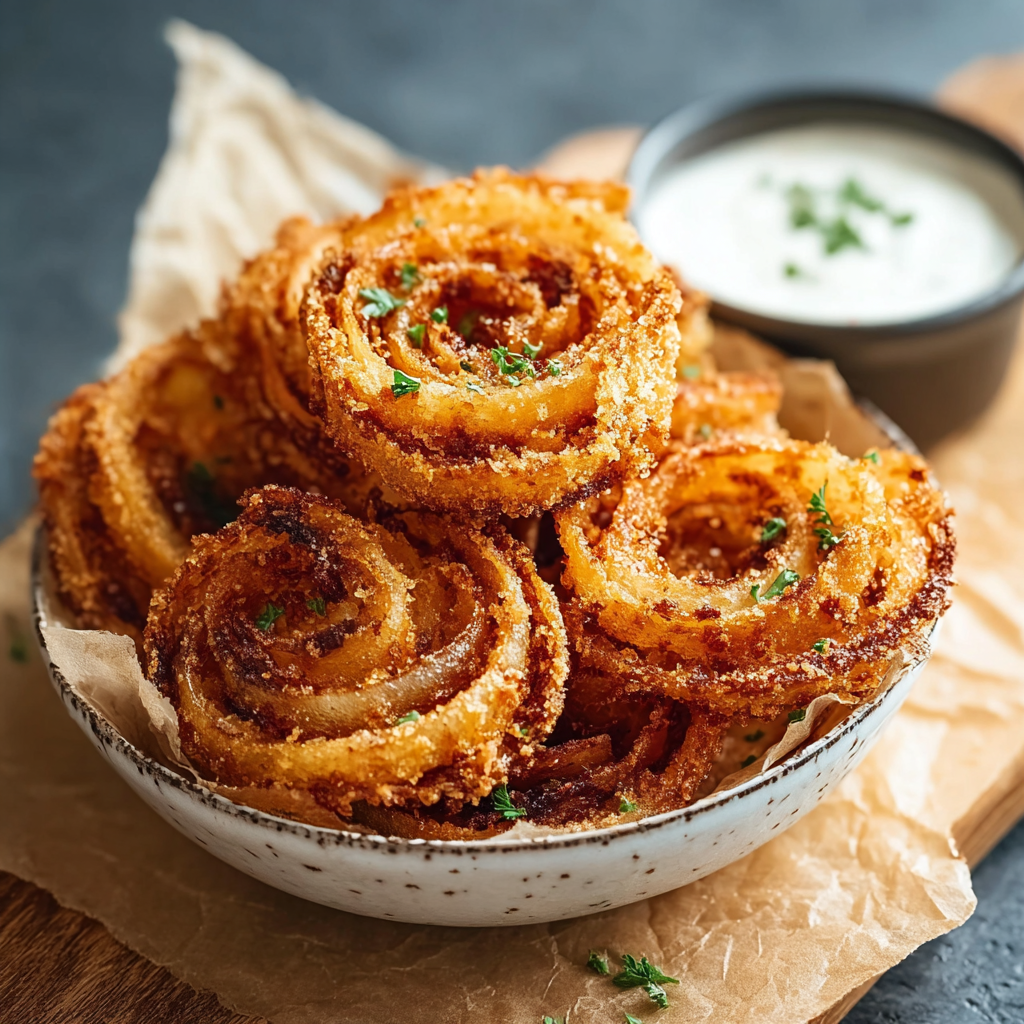
You Must Know
- Frying temperature matters: keep oil around 350°F. If it’s cooler, the chips absorb oil and become greasy; if hotter, they brown too fast and may burn.
- These freeze well for up to 3 months. Flash-freeze on a tray, then transfer to a sealed bag. Reheat in a 425°F oven for 6–8 minutes to restore crispness.
- High in carbohydrates from flour and panko; pair with a protein-rich dip (yogurt-based or cottage cheese blends) for a more balanced snack.
- Use a slotted spoon and a wire rack to drain — paper towels can steam the underside and soften the crust if stacked immediately.
My favorite part is how reliably these turn out, even when I’m multitasking. The first time I made them for a family movie night, everyone went back for seconds and planned their plates around these chips. Over time I learned small adjustments — like blotting rings and maintaining oil temp — made the biggest difference.
Storage Tips
Store cooled chips in an airtight container at room temperature for up to 24 hours; beyond that they lose crispness. For longer storage, freeze them flat on a baking sheet for 1 hour, then transfer to a freezer bag for up to 3 months. To re-crisp, bake at 425°F on a wire rack for 6 to 10 minutes from frozen, flipping once. Avoid microwaving — it softens the coating.
Ingredient Substitutions
If you don’t have buttermilk, make a substitute by adding 1 tablespoon white vinegar or lemon juice to 1 cup milk and letting it sit 5 minutes. For gluten-free, replace flour with a 1-to-1 gluten-free blend and swap panko for gluten-free panko. Use cornmeal or crushed cornflakes instead of panko for a different crunch; this will yield a grainier texture and a slightly sweeter finish.
Serving Suggestions
Serve warm with a trio of dips: classic ketchup, a quick garlic aioli (mayonnaise, minced garlic, lemon juice), and a smoky chipotle yogurt dip. Plate on a wire rack over parchment for the best presentation and to keep bottoms crisp. Pair with sliders, grilled sandwiches, or a composed salad to balance the fried element. Garnish with chopped parsley or a dusting of smoked paprika for color and aroma.

Cultural Background
Onion rings have roots in American diner and fair cuisine from the early 20th century, where deep-fried comforts became symbols of casual eating. Panko, a Japanese breadcrumb, was later adopted by Western cooks for its extra-light texture, improving the classic coating. Combining these traditions yields a hybrid snack that nods to both American comfort food and Japanese culinary textures — a simple cross-cultural upgrade that keeps the flavor familiar but adds refined crunch.
Seasonal Adaptations
In spring and summer, use sweet, fresh onions and serve with bright herb-based dips like chimichurri yogurt. In autumn, add smoked paprika or a pinch of ground cumin to the flour for warmth and serve with apple-butter mustard. For winter gatherings, swap plain panko for seasoned breadcrumbs with rosemary and thyme for a heartier, savory profile that pairs well with richer mains.
Meal Prep Tips
Prep the components ahead: slice onions and store rings in a single layer on parchment in the fridge for up to 24 hours. Mix the seasoned flour and measure panko in containers. When guests arrive, complete the dredging and frying — the process takes 10 to 15 minutes. If frying for a crowd, keep finished rings warm on a baking sheet in a 200°F oven on a wire rack so they remain crisp without overcooking.
These onion ring chips are fun to make, easy to scale, and always a crowd-pleaser. Whether you serve them at a party or snack on them during a movie, they deliver a reliable crunch and comforting onion sweetness that make every bite satisfying. Try them with different spices and dips — they invite experimentation and hands-down approval.
Pro Tips
Blot sliced rings dry before coating to help the batter adhere and produce a better crunch.
Maintain oil temperature around 350°F for consistent frying and minimal oil absorption.
Use a wire rack to drain fried chips so steam doesn’t soften the crust; paper towels alone can trap moisture.
This nourishing onion ring chips recipe is sure to be a staple in your kitchen. Enjoy every moist, high protein slice — it is perfect for breakfast or as a wholesome snack any time.
FAQs about Recipes
How do I prevent onion rings from getting greasy?
Keep oil temperature steady at about 350°F and fry in small batches to avoid soggy coating.
Can I freeze onion ring chips?
Flash-freeze on a sheet and store in a sealed bag for up to 3 months. Reheat in a hot oven to restore crispness.
Tags
Onion Ring Chips
This Onion Ring Chips recipe makes perfectly juicy, tender, and flavorful steak every time! Serve with potatoes and a side salad for an unforgettable dinner in under 30 minutes.
Ingredients
Primary
Instructions
Slice and dry onions
Peel and slice 2 large onions into 1/4-inch rings. Separate rings and blot dry with a towel to remove excess moisture so coatings stick better.
Prepare seasoned flour
Whisk 1 cup all-purpose flour, 1 teaspoon garlic powder, 1 teaspoon paprika, 1/2 teaspoon salt, and 1/2 teaspoon black pepper in a wide bowl to create an even seasoned dredge.
Soak in buttermilk
Place onion rings in 1 cup buttermilk and let sit 5 minutes so the liquid clings, tenderizes slightly, and helps subsequent coatings adhere.
Dredge and coat
Set up three bowls: flour, buttermilk-soaked rings, and 2 cups panko. Dredge each ring in flour, dip in buttermilk, then press into panko. For extra crunch, repeat buttermilk and panko for a double coat.
Heat oil and fry
Heat vegetable oil to 350°F in a deep pan with about 2 inches of oil. Fry rings in small batches for 2–3 minutes until golden, turning once. Do not overcrowd the pan.
Drain and season
Transfer fried rings to a wire rack or paper towels to drain. Season lightly with salt while still hot and serve immediately with dips.
Last Step: Please leave a rating and comment letting us know how you liked this recipe! This helps our business to thrive and continue providing free, high-quality recipes for you.
Nutrition
Did You Make This?
Leave a comment & rating below or tag
@galovicooking on social media!
Categories:
You might also like...
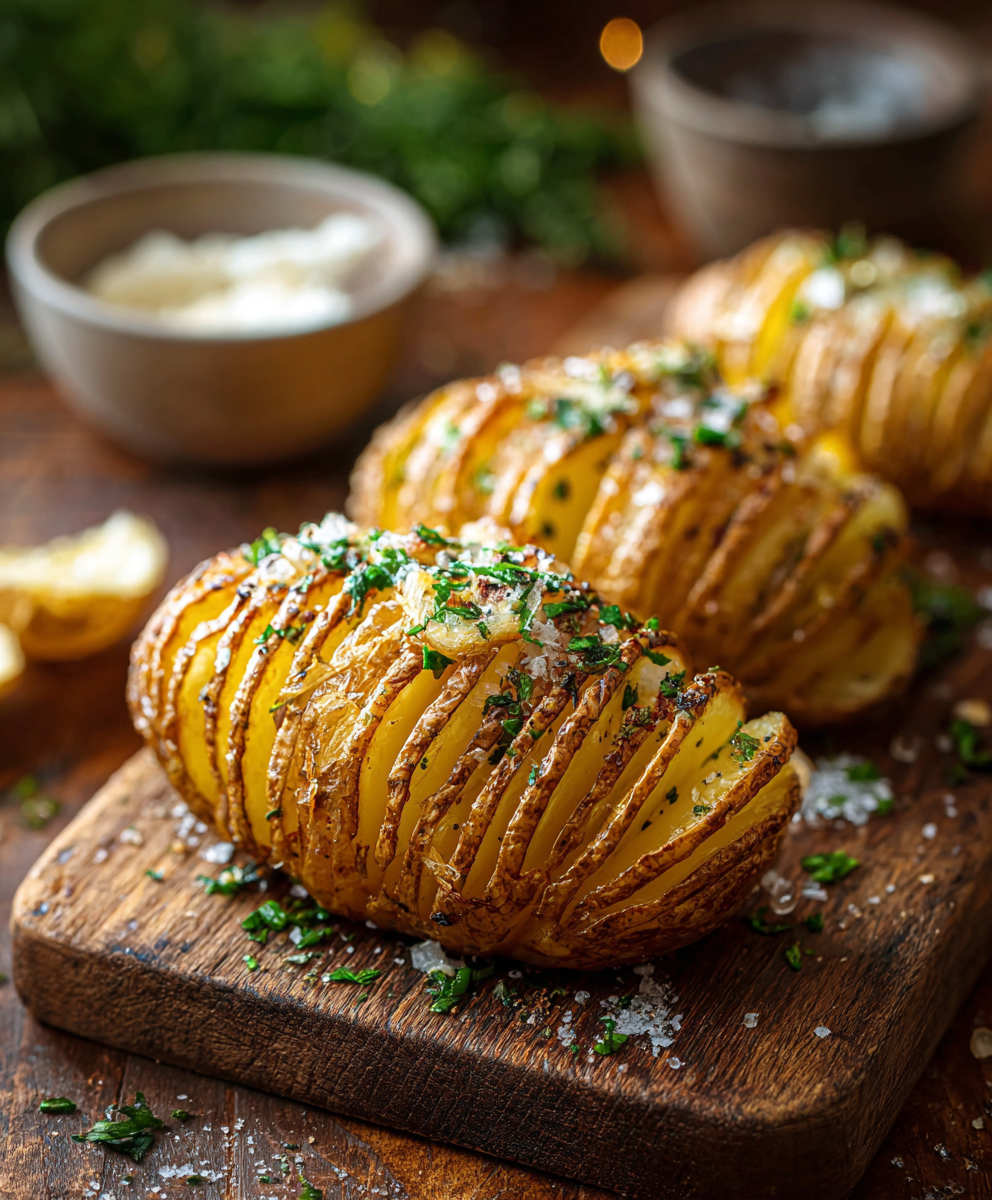
Classic Hasselback Potatoes
Crispy on the outside, tender inside: classic Hasselback potatoes brushed with melted butter and seasoned simply with kosher salt and pepper.
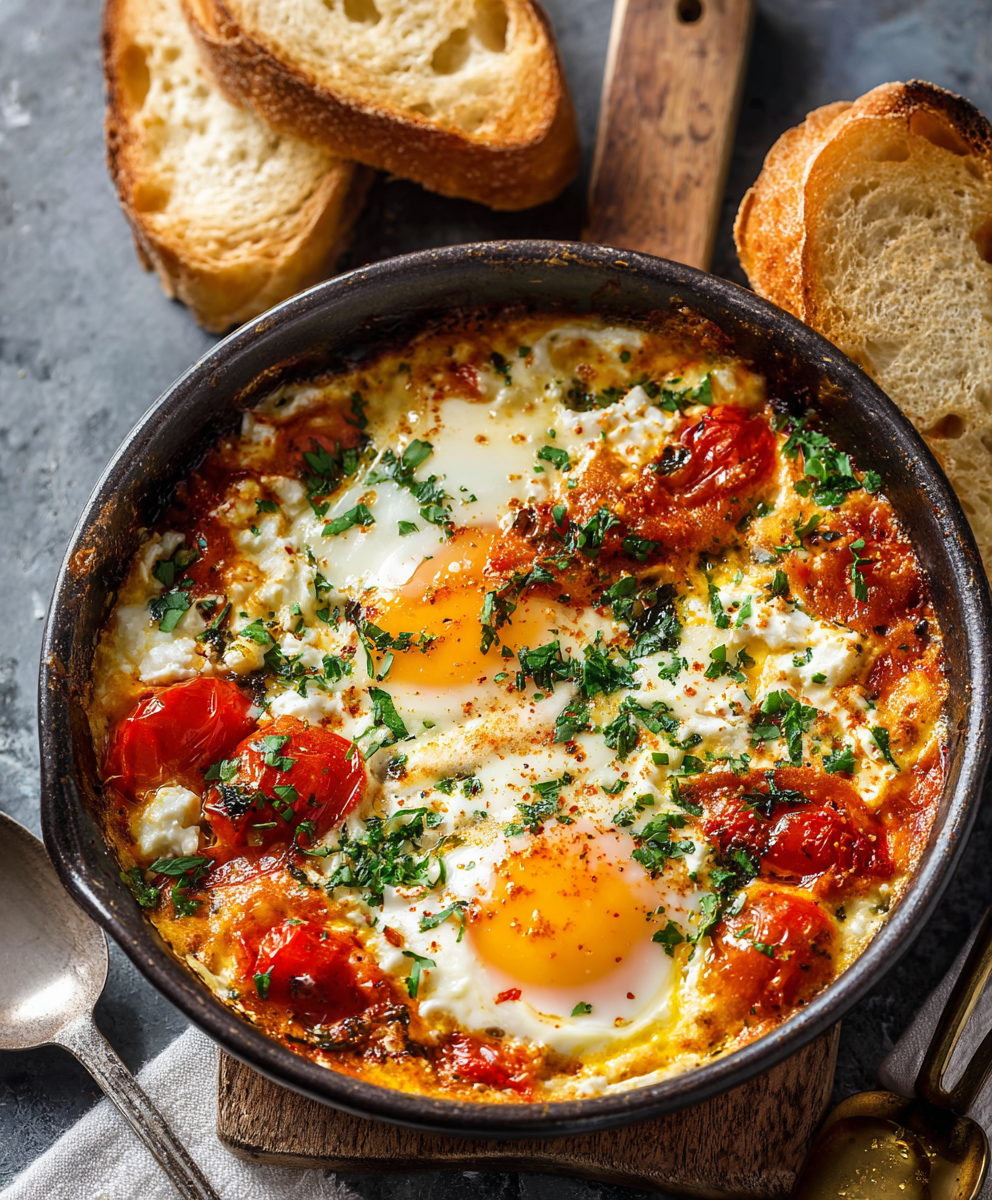
Baked Feta Eggs
A comforting Mediterranean-inspired bake of roasted tomatoes, feta, spinach, and eggs — creamy, savory, and perfect for breakfast, brunch, or an easy weeknight meal.

Key Lime Pie Yogurt Bark
A bright, tangy frozen treat that channels key lime pie in a protein-packed, freezer-ready bark — perfect for warm days, snack prep, and a lighter dessert.
Did You Make This?
Leave a comment & rating below or tag @galovicooking on social media!
Rate This Recipe
Share This Recipe
Enjoyed this recipe? Share it with friends and family, and don't forget to leave a review!
Comments (1)
This recipe looks amazing! Can't wait to try it.
Comments are stored locally in your browser. Server comments are displayed alongside your local comments.

Hi, I'm Ava!
What's Popular
30-Minute Meals!
Join to receive our email series which contains a round-up of some of our quick and easy family favorite recipes.