>>
30-MINUTE MEALS! Get the email series now →

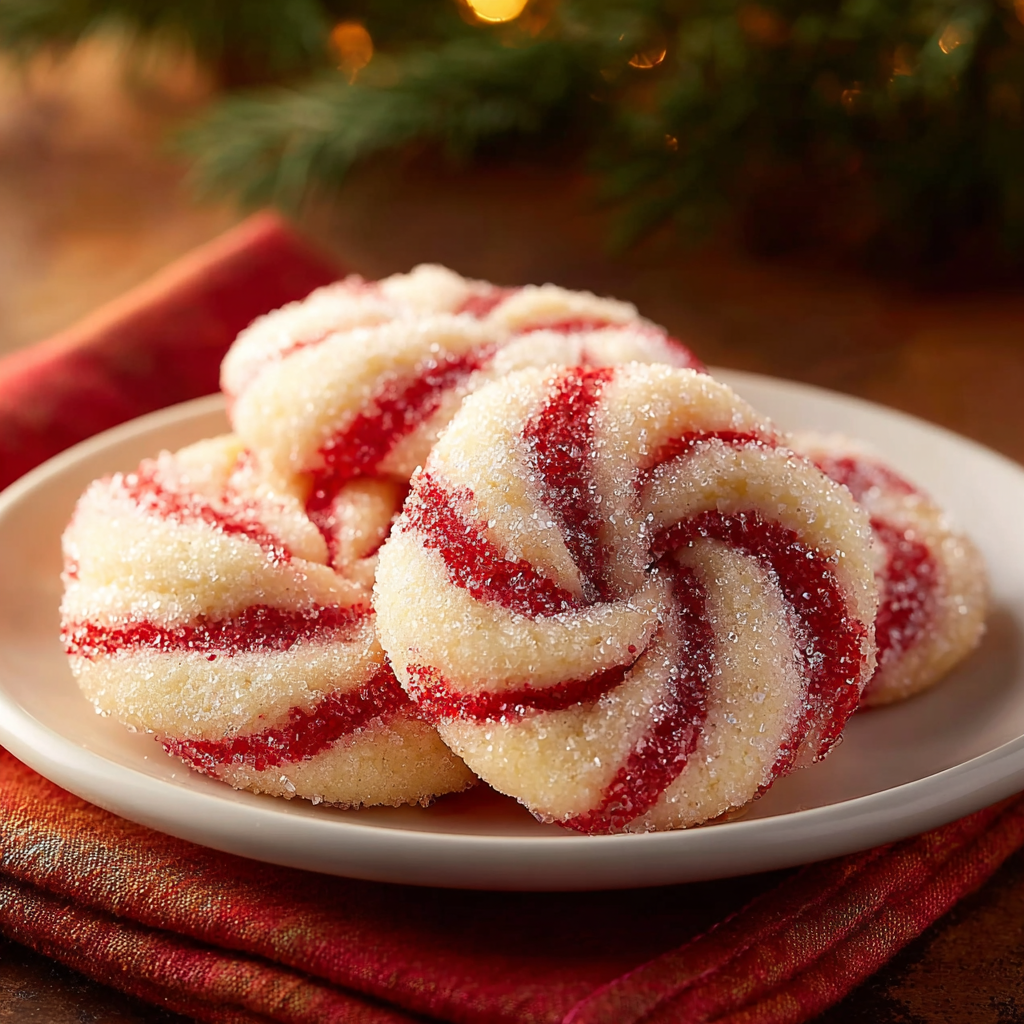
Buttery, tender cookies with a festive peppermint swirl, lightly coated in coarse sugar or crushed candy for sparkle and crunch.

This peppermint swirl cookie recipe has been my favorite winter treat for years; it arrived in my kitchen the first December I tried to recreate a bakery memory for a holiday party. I wanted a cookie that felt both classic and playful, crisp at the edges but soft and tender inside, with a defined red swirl and a clear peppermint flavor that is not overpowering. After a few rounds of testing, adjusting the amount of peppermint extract and how finely to crush the candy for coating, this version became the one I send as gifts and bring to gatherings. The swirl is simple but dramatic, and the coarse sugar or crushed peppermint on top adds just the right amount of texture.
I discovered how small changes make a big difference. Using room temperature butter and letting the dough rest improves texture; switching from powdered food color to a concentrated gel keeps the color vivid without thinning the dough; and chilling the shaped dough makes cleaner swirls and prevents spreading. These cookies are as much about the ritual as the result. Rolling and spiraling the two dough colors is a relaxing step that kids can help with, while the aroma of peppermint and butter in the oven signals that holiday company is welcome. They are perfect for cookie exchanges, gift tins, or a quiet tray beside a steaming mug of cocoa.
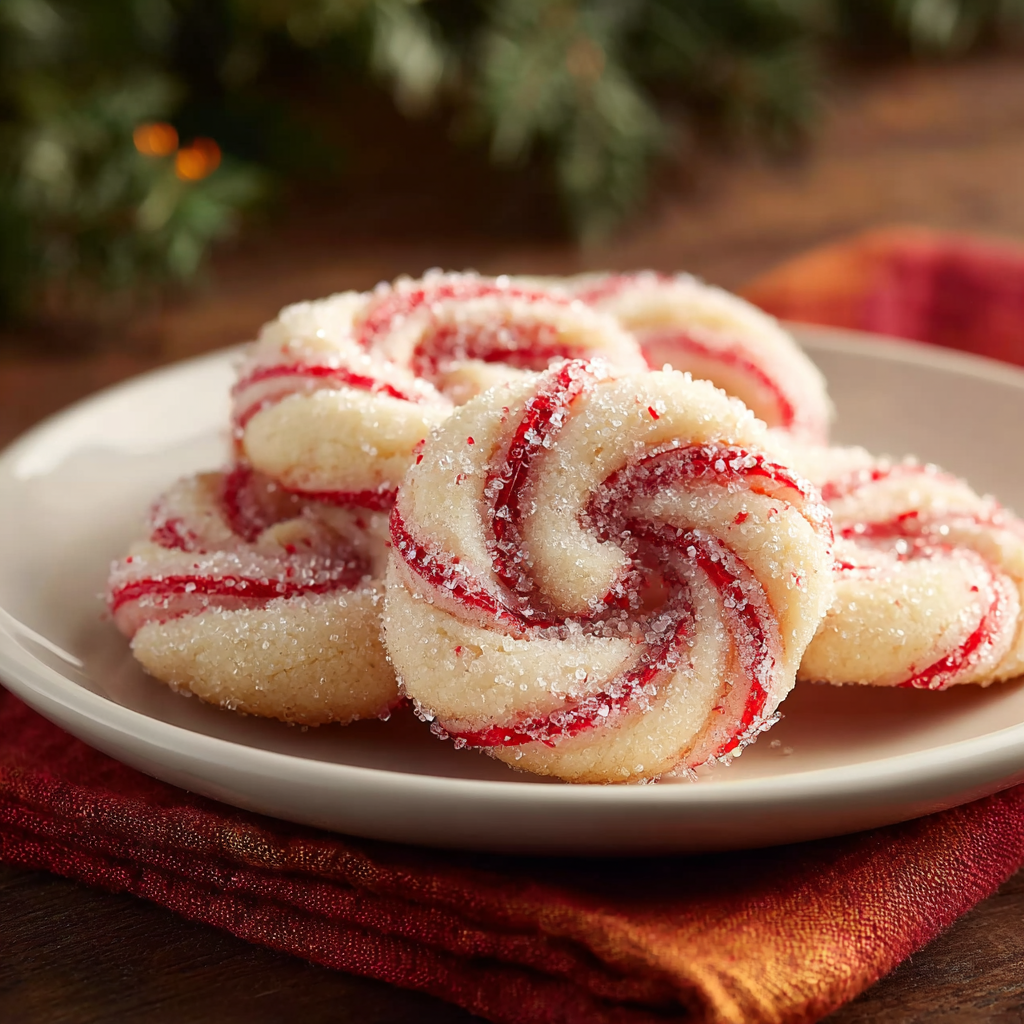
My family reaction to the first batch was immediate: plates cleared and the youngest declared them the most Christmassy cookie ever. These cookies travel well to potlucks and keep their texture for a couple of days in an airtight tin. Over several seasons I learned to reduce the peppermint slightly from my initial instinct so the butter and vanilla still shine through. When I bring these to friends, the swirl always starts a conversation and I love that moment of simple delight.
My favorite thing about this recipe is how adaptable it is. One winter I mixed in a teaspoon of finely grated orange zest to half the batch and the orange-peppermint combination became a new holiday favorite with friends. Over the years I have learned the tiny details that make each cookie consistent, such as not overworking the dough and chilling the log long enough to firm it.
For short term storage, arrange completely cooled cookies in a single layer in an airtight container, separating layers with parchment paper to prevent sticking. At room temperature they maintain quality for about 2 to 3 days. For longer storage, freeze baked cookies on a tray until firm, then transfer to a freezer-safe container or bag for up to 3 months. To refresh frozen cookies, thaw at room temperature for 30 minutes and place in a 300 degrees F oven for 4 to 5 minutes if you want the sugar to sparkle again. If you freeze the dough logs instead of baked cookies, wrap tightly and store for up to 2 months; thaw in the refrigerator overnight before slicing and baking.
If you prefer a dairy-free option, substitute a plant-based stick butter margarine formulated for baking and use a flax egg equivalent if needed, though texture will be slightly different. For a gluten-free version, replace the flour with a 1-to-1 gluten-free baking flour blend that includes xanthan gum; expect a slightly denser texture. If peppermint extract is unavailable, substitute 1 teaspoon of mint chocolate chip coffee creamer concentrate or reduce to 3/4 teaspoon of spearmint extract for a milder mint note. Swap coarse sugar for sanding sugar for a finer sparkle, and crushed peppermints can be replaced with freeze-dried strawberry pieces for a pink swirl without mint.
Serve these cookies on a holiday platter with other small bites like chocolate truffles and ginger snaps. They pair beautifully with hot chocolate, black tea, or an espresso martini for adults. Garnish a plate with sprigs of fresh rosemary for a festive look that complements the mint. For gift tins, layer cookies between parchment and include a small note about chilling before baking if you choose to send frozen dough logs. For a dessert plate, place two cookies on a dish with a scoop of vanilla ice cream and drizzle with warm chocolate sauce for an elegant finish.
The combination of peppermint flavor and crisp, buttery cookies is a modern twist on European butter biscuits and vintage American holiday cookies. Candy canes and peppermint candies became associated with holiday traditions in the 19th and 20th centuries, and using crushed candy as a topping is a 20th century innovation to add both texture and seasonal flair. These cookies blend classic cookie technique with the bright, cool flavor profile of peppermint that is now a hallmark of winter celebrations across North America.
In winter, use crushed peppermints and red gel for a classic look. For spring, replace peppermint with 1 teaspoon lemon extract and use a small amount of yellow gel for a citrus swirl. At Halloween, split the dough into orange and black colors and use crushed black licorice or colored sugar. For summer, reduce peppermint to 1/2 teaspoon and fold in 1/4 cup finely chopped freeze-dried strawberries to the colored dough for a pink berry swirl with a hint of mint.
Prepare several dough logs in advance and freeze them individually wrapped. Label with the date and color. When hosting, slice and bake directly from chilled or slightly thawed logs for fresh-baked results in under 12 minutes per sheet. Use silicone baking mats for consistent browning. If you plan to transport cookies, place them in a single layer in a shallow airtight tin lined with parchment, then stack with additional parchment between layers to prevent breaks. For gifting, include a small instruction card if you send frozen logs so recipients can bake to order.
These cookies are cheerful, forgiving, and reliably delicious. They bring a sense of ritual to holiday baking and an easy way to make attractive treats without complicated techniques. I hope they become a staple in your winter baking rotation and a favorite to share with friends and family.
Chill the formed log for at least 30 minutes to prevent spreading and to keep the swirl sharp.
Use gel food coloring a drop at a time to reach the desired shade without thinning the dough.
If your peppermint extract is strong, reduce to 3/4 teaspoon to avoid an overpowering flavor.
Rotate baking sheets halfway through baking for even color and crisp edges.
This nourishing peppermint swirl cookies recipe is sure to be a staple in your kitchen. Enjoy every moist, high protein slice — it is perfect for breakfast or as a wholesome snack any time.
Yes. You can freeze the formed dough log for up to 2 months. Thaw overnight in the refrigerator before slicing and baking.
Use gel food coloring for more vivid color and less liquid. Powders or concentrated gels are best to avoid changing dough consistency.
This Peppermint Swirl Cookies recipe makes perfectly juicy, tender, and flavorful steak every time! Serve with potatoes and a side salad for an unforgettable dinner in under 30 minutes.
Whisk together all-purpose flour, baking powder, and salt in a medium bowl. Set aside so they are evenly combined before adding to the wet ingredients.
Cream softened unsalted butter with granulated sugar on medium speed until pale and fluffy, about 2 to 3 minutes. Scrape down the bowl once for even mixing.
Add the large egg, vanilla extract, and peppermint extract. Mix until just combined, avoiding overbeating to keep the texture tender.
Fold the dry ingredients into the wet in two additions until just combined. Divide dough into two equal portions, leaving one plain and tinting the other with red gel coloring.
Roll each portion into logs, press together, and twist gently to form a spiral. Wrap tightly and chill for at least 30 minutes to firm up.
Preheat oven to 350 degrees F. Slice logs into 1/4 to 1/3-inch rounds and roll edges in coarse sugar or crushed peppermint. Arrange on parchment-lined baking sheets.
Bake for 10 to 12 minutes until edges are lightly golden. Cool on the sheet for 5 minutes, then transfer to a wire rack to cool completely.
Last Step: Please leave a rating and comment letting us know how you liked this recipe! This helps our business to thrive and continue providing free, high-quality recipes for you.
Leave a comment & rating below or tag
@galovicooking on social media!
Crispy on the outside, tender inside: classic Hasselback potatoes brushed with melted butter and seasoned simply with kosher salt and pepper.

A comforting Mediterranean-inspired bake of roasted tomatoes, feta, spinach, and eggs — creamy, savory, and perfect for breakfast, brunch, or an easy weeknight meal.

A bright, tangy frozen treat that channels key lime pie in a protein-packed, freezer-ready bark — perfect for warm days, snack prep, and a lighter dessert.
Leave a comment & rating below or tag @galovicooking on social media!
Enjoyed this recipe? Share it with friends and family, and don't forget to leave a review!
This recipe looks amazing! Can't wait to try it.
Comments are stored locally in your browser. Server comments are displayed alongside your local comments.

Join to receive our email series which contains a round-up of some of our quick and easy family favorite recipes.