>>
30-MINUTE MEALS! Get the email series now →

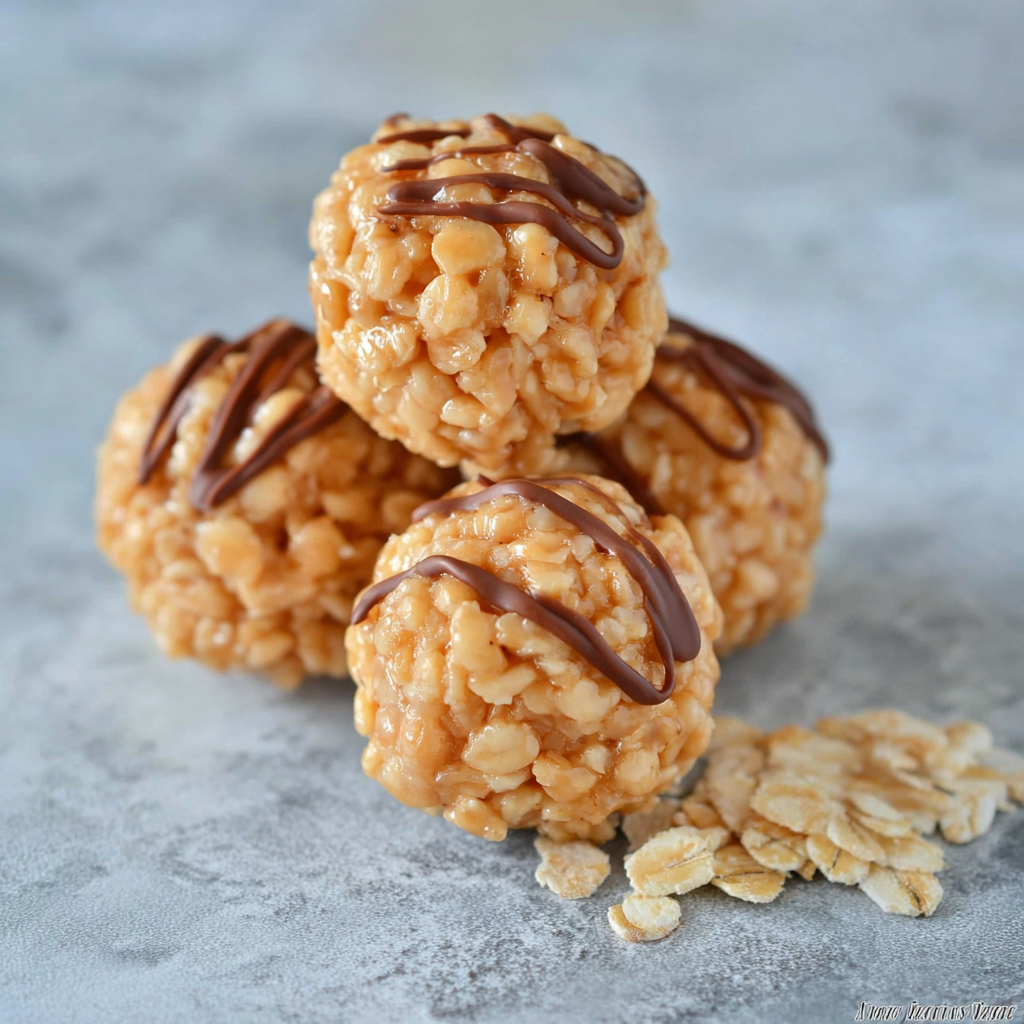
Chewy peanut butter centers wrapped around crisp rice cereal and optional chocolate, a quick no bake treat that is perfect for parties and lunchboxes.
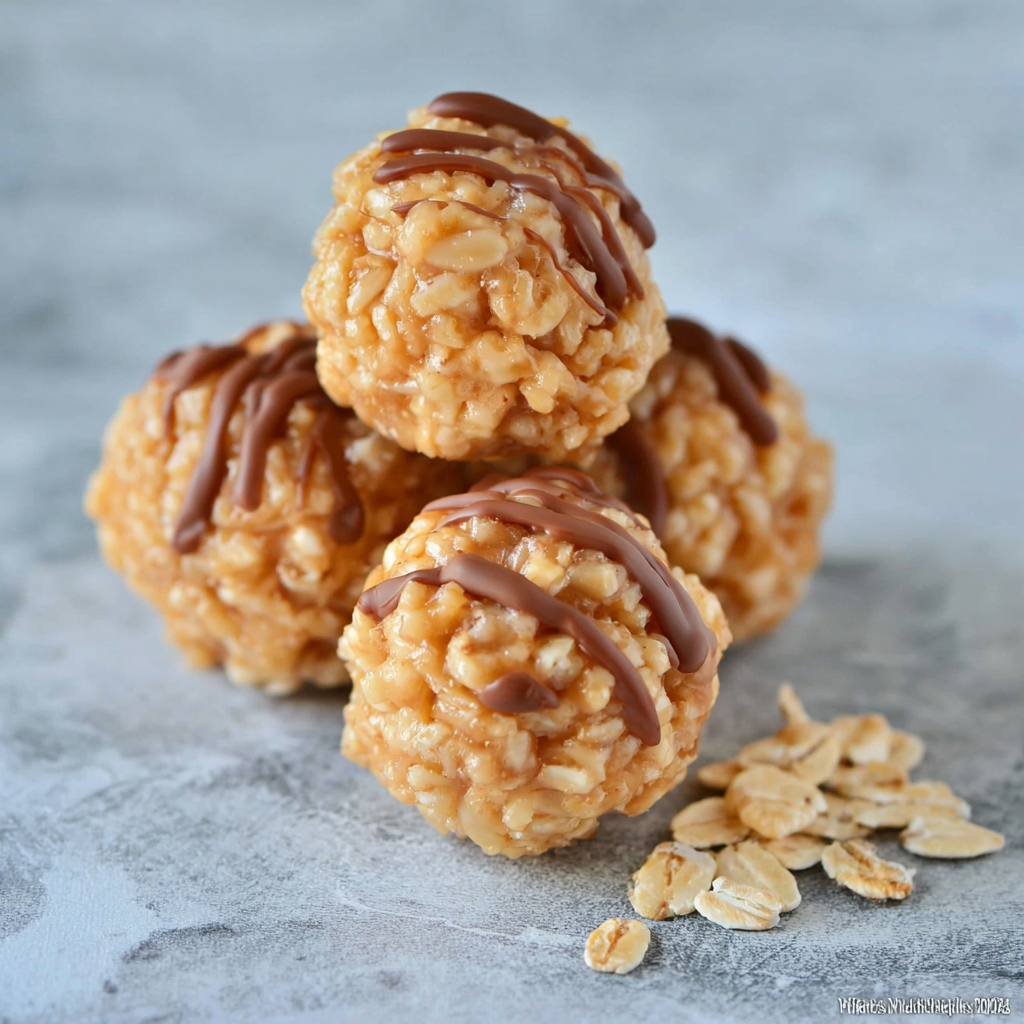
This simple rice crispy peanut butter balls recipe has been a staple in my kitchen for years and always draws a crowd. I first made these on a rainy Saturday when the kids were home and wanted something sweet but easy. The combination of creamy peanut butter and crunchy rice cereal creates a contrast of texture that is both comforting and playful. Each bite offers a chewy center with a light crunch and a hint of toasted chocolate if you choose to dip them. My family calls them the tiny comfort orbs and they disappear faster than I can count.
I discovered a balance that works after a few experiments. Too much marshmallow makes the mixture gummy. Too much powdered sugar makes the centers dry. The trick I settled on keeps the centers tender yet firm enough to roll and hold a chocolate coating if you want to add one. I love making a double batch before holidays and freezing half for unexpected guests. These are the sort of treats that feel like a celebration even on an ordinary Tuesday.
In our house these have become a small tradition. I sometimes make them when I need a quick gift to take to a neighbor or when the school bake sale calls. The best part is the reaction when someone bites in and gets that mix of peanut butter cream and crisp rice pieces. It never gets old.

My favorite aspect is how forgiving this method is. I have wrapped leftover mixtures in wax paper and pressed them into a loaf pan to slice later when I want bars rather than balls. Family members often ask for a plain peanut butter version or the chocolate dipped version depending on their mood. Both always disappear quickly.
Store the finished pieces in a single layer if possible or separate layers with parchment paper to prevent sticking. Refrigerate in an airtight container where they will stay fresh for up to seven days. For longer storage freeze them on a baking sheet until firm then transfer to a heavy duty freezer bag. Thaw overnight in the refrigerator before serving or dip in chocolate while still slightly frozen for a crisp snap in the coating. Avoid room temperature storage for more than two days in warm weather to prevent oil separation in peanut butter.
If you need to avoid peanuts swap in sunflower seed butter or tahini for a nut free option. Use vegan marshmallows and dairy free butter to make a vegan friendly batch. For a less sweet or lower caloric option reduce marshmallows and add one quarter cup of powdered sugar to maintain structure. You can also substitute half of the rice cereal with puffed quinoa to increase protein and change texture. Keep in mind that different nut butters vary in oil content which affects chilling time and firmness.
Serve these on a small platter with fresh fruit to balance sweetness. They make a nice addition to a cookie tray for gatherings or pack well in lunchboxes alongside celery sticks for textural contrast. For a holiday presentation arrange them in paper liners and tie with a ribbon. If you want a dessert plate style garnish with a drizzle of melted chocolate and a sprinkle of flaky sea salt.
The combination of peanut butter and puffed rice has roots in American pantry traditions where convenience cereals and creamy spreads came together to create quick sweets. Variations of rice and nut sweet bites exist globally with local ingredients like sesame seed paste in Middle Eastern treats or coconut in Southeast Asian snacks. These rice crispy peanut butter balls are an American style comfort food that evolved from bar and square creations to a hand held bite enjoyed at potlucks and family gatherings.
Change toppings with the seasons. In fall add a pinch of cinnamon and roll in crushed graham cracker for a warming note. In winter use peppermint extract and roll in crushed candy cane. In summer skip the chocolate coating to keep them lighter and pair with a yogurt dip. Fresh seasonal fruit alongside them helps create a balanced snack during warmer months.
Make a double batch and freeze half for quick snacks during a busy week. Portion into small reusable containers for grab and go treats. If using chocolate coating dip only what you plan to eat within a week and keep plain centers frozen. Label containers with date and variety so you can rotate flavors and avoid freezer mystery. A small cookie scoop ensures uniform portioning and consistent reheating times if you warm them briefly in the microwave before serving.
These rice crispy peanut butter balls are comfort food with a simple process and flexible outcomes. They are quick to make, forgiving in execution and wonderful to share. Give them a try and make them your own with the toppings and swaps that suit your pantry and taste.
Chill the mixture briefly before shaping so it is easier to work with and the balls hold together.
Use a cookie scoop for consistent size and faster assembly.
If peanut butter is oily refrigerate it first or reduce oil by stirring before measuring.
To get a glossy chocolate coating add one tablespoon of coconut oil to melted chips.
Freeze shaped but uncoated balls for easy future dipping or serving.
This nourishing rice crispy peanut butter balls recipe is sure to be a staple in your kitchen. Enjoy every moist, high protein slice — it is perfect for breakfast or as a wholesome snack any time.
Yes store them in an airtight container in the refrigerator for up to seven days or freeze for up to three months.
Use sunflower seed butter at a one to one ratio and check oil separation. Use vegan marshmallows to avoid gelatin.
Use a small cookie scoop to portion uniformly and press firmly when shaping so they hold together well.
This Rice Crispy Peanut Butter Balls recipe makes perfectly juicy, tender, and flavorful steak every time! Serve with potatoes and a side salad for an unforgettable dinner in under 30 minutes.
Line a baking sheet with parchment or a silicone mat and chill the sheet. Have a medium mixing bowl and a small cookie scoop ready for portioning.
In a medium saucepan over low heat melt half a cup of butter until foamy. Add ten ounces of mini marshmallows and stir constantly until melted and smooth.
Remove the pan from heat and stir in one cup of creamy peanut butter until fully combined and smooth. Work quickly so the mixture remains warm and pliable.
Pour six cups of crisp rice cereal into your bowl. Add the warm peanut butter mixture and fold gently with a spatula until the cereal is evenly coated.
Allow the mixture to cool five to ten minutes to make handling easier. Use a tablespoon or small scoop to form balls. Press firmly so they hold their shape and place on the chilled sheet. Refrigerate for at least fifteen minutes to set.
Melt eight ounces of chocolate chips in short bursts in the microwave, stirring every twenty seconds until smooth. Stir in one tablespoon of coconut oil for gloss. Dip chilled balls and return to parchment. Chill until set.
Store in an airtight container in the refrigerator for up to seven days or freeze for up to three months. Layer parchment between to prevent sticking.
Last Step: Please leave a rating and comment letting us know how you liked this recipe! This helps our business to thrive and continue providing free, high-quality recipes for you.
Leave a comment & rating below or tag
@galovicooking on social media!
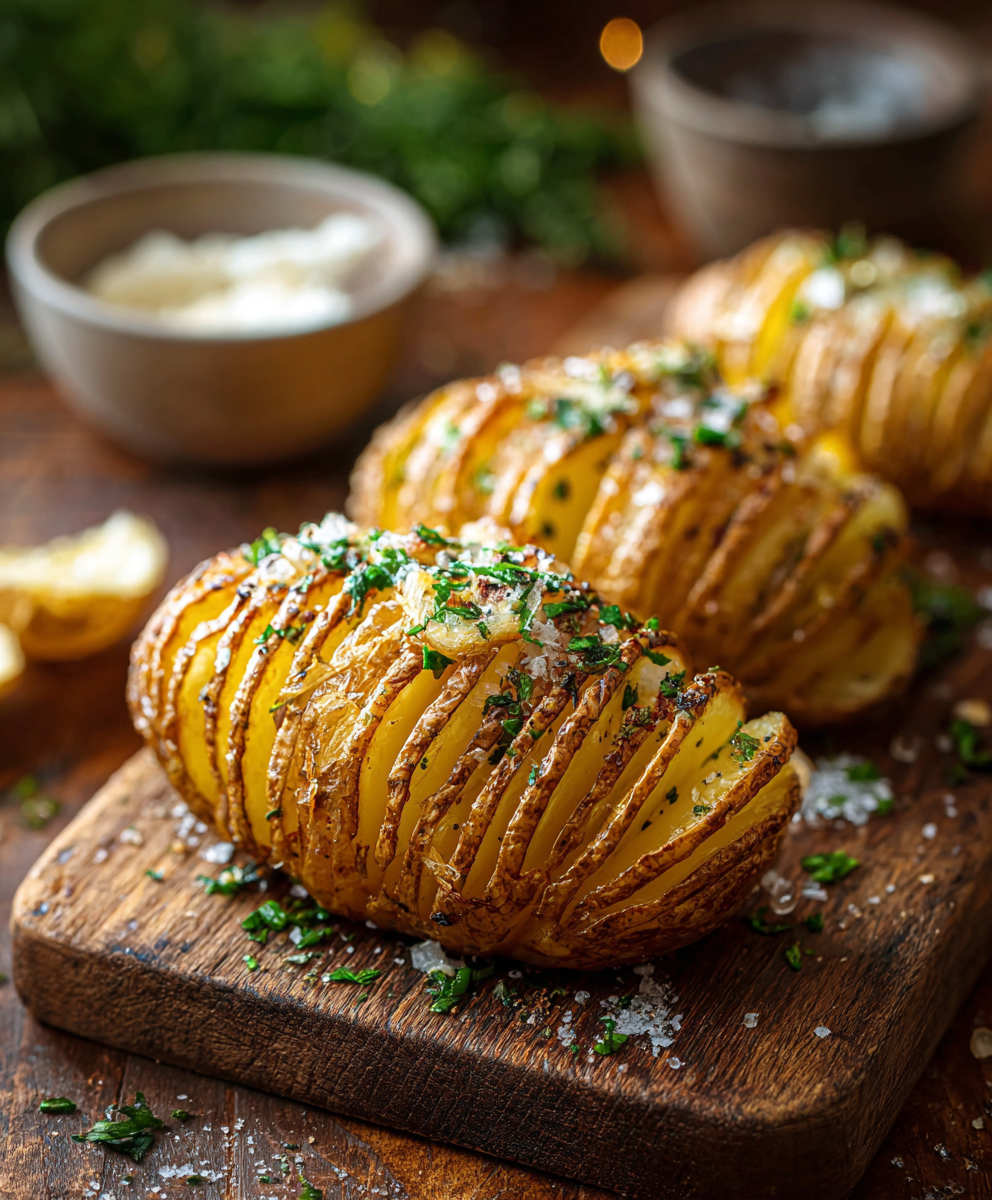
Crispy on the outside, tender inside: classic Hasselback potatoes brushed with melted butter and seasoned simply with kosher salt and pepper.
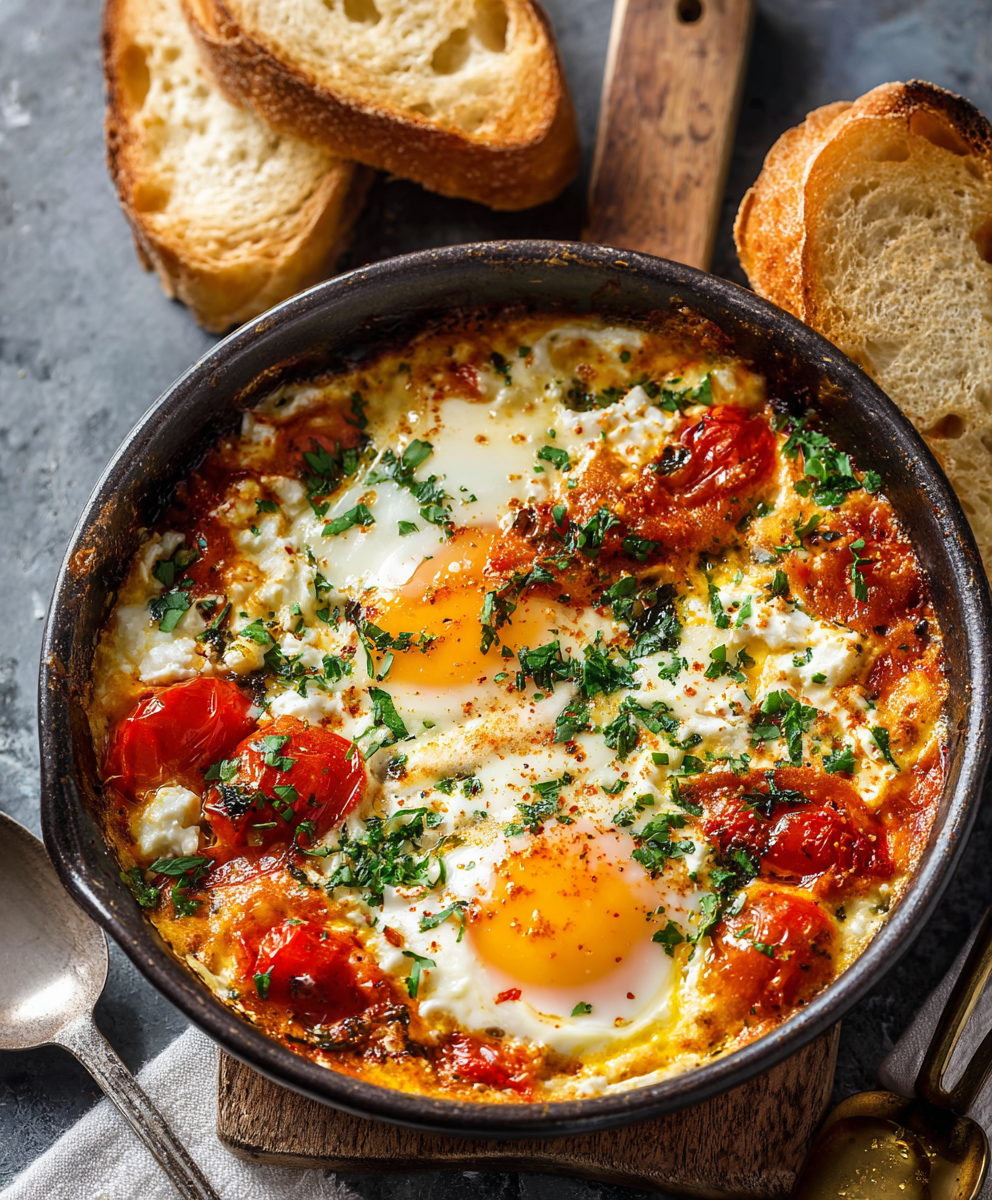
A comforting Mediterranean-inspired bake of roasted tomatoes, feta, spinach, and eggs — creamy, savory, and perfect for breakfast, brunch, or an easy weeknight meal.

A bright, tangy frozen treat that channels key lime pie in a protein-packed, freezer-ready bark — perfect for warm days, snack prep, and a lighter dessert.
Leave a comment & rating below or tag @galovicooking on social media!
Enjoyed this recipe? Share it with friends and family, and don't forget to leave a review!
This recipe looks amazing! Can't wait to try it.
Comments are stored locally in your browser. Server comments are displayed alongside your local comments.

Join to receive our email series which contains a round-up of some of our quick and easy family favorite recipes.